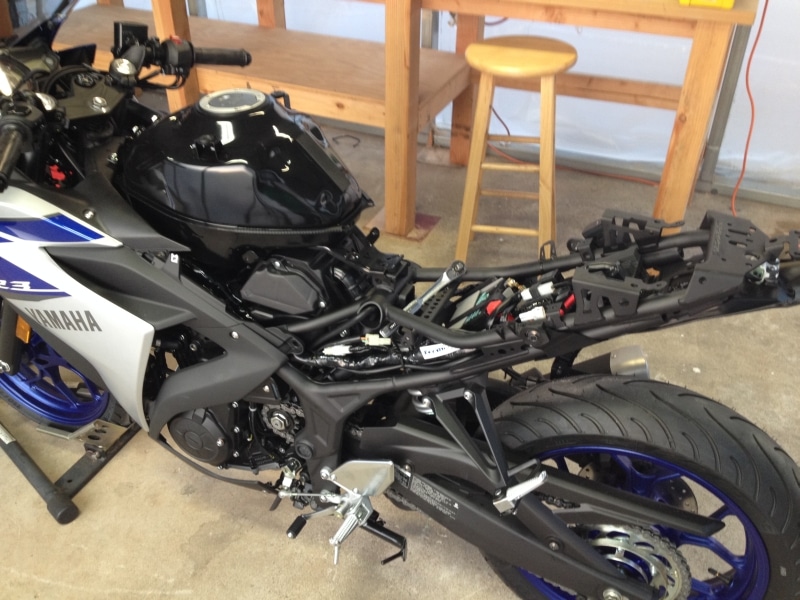
How to remove the gas tank from the Yamaha R3

This post contains step by step instructions for how to remove the fuel tank from the Yamaha R3. Enjoy!
Tools Needed:
10mm socket
8mm socket
4mm allen wrench
First remove the seat and side panels, follow steps 1-4 here: How to take apart the tail of the Yamaha R3
Yamaha R3 How to remove the gas tank
Gas Tank Removal:
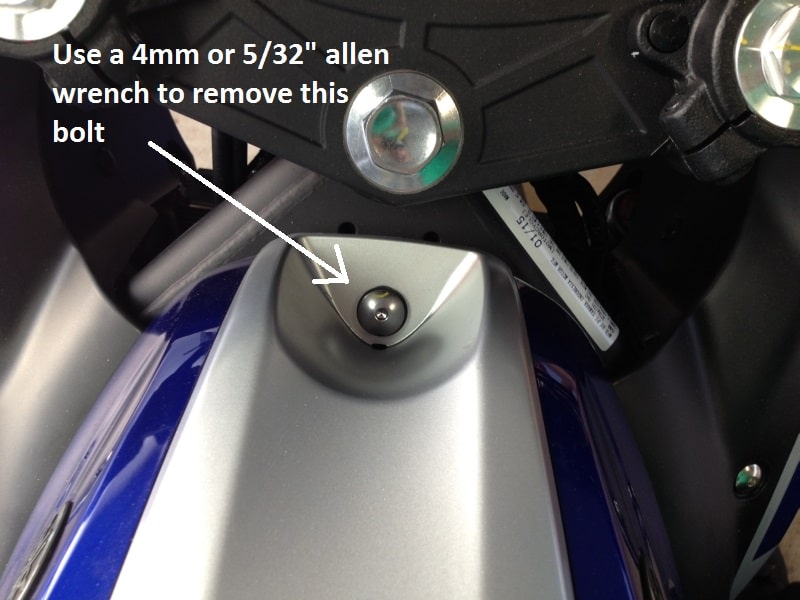
Step 1: Use a 4mm or 5/32″ allen wrench to remove the bolt from the front center of the tank cover.
Step 2: Use an 8mm or 5/16″ socket to remove the four bolts from the sides of the tank cover.
*caution* These bolts are VERY tight, I don’t recommend using a phillips screwdriver…

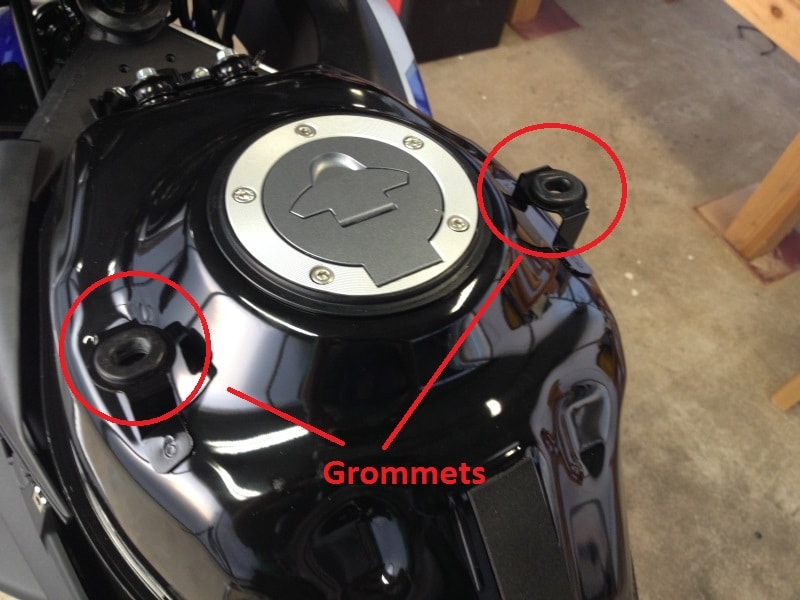
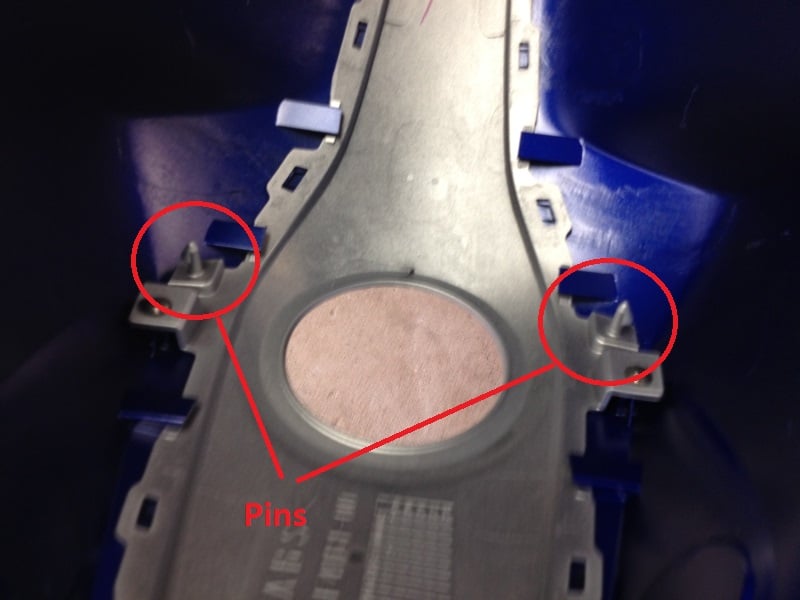
Step 3: Pull the tank cover off. It is held on with 2 pins that press into two grommets on the top, here’s a quick video of the method that I found to work well without damaging the cover.
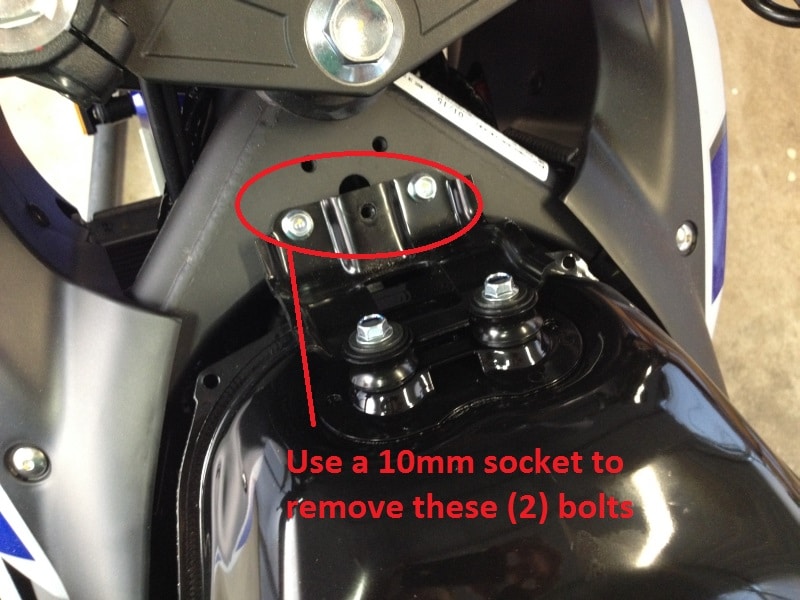
Step 4: Use a 10mm socket to remove the two bolts from the front bracket of the gas tank that attach the tank to the frame and the two bolts from the rear of the gas tank.
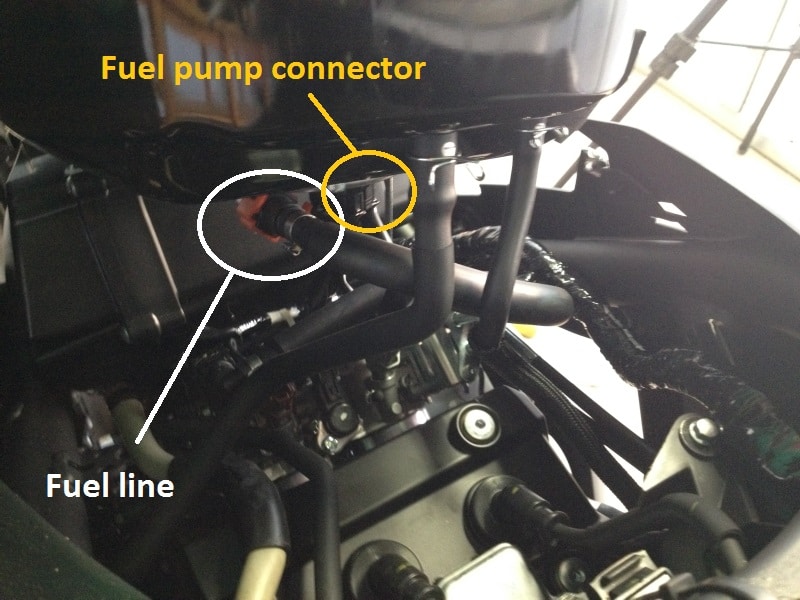
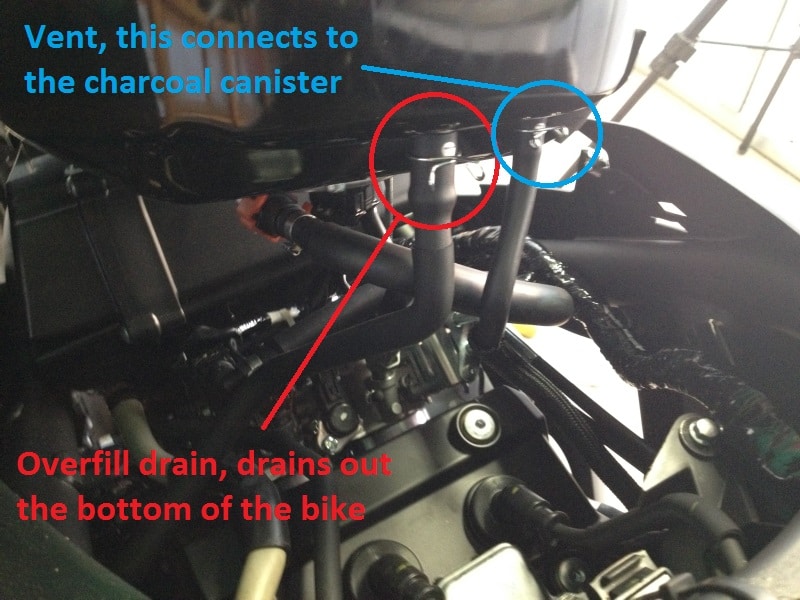
Step 5: Pull the tank up and to the rear of the bike to access the fuel pump connector, vent hose, overfill drain, and fuel line, and disconnect them all. To disconnect the fuel line, slide the plastic clip to the side slightly, then squeeze the clip releases on both sides and pull the fuel line off the tank. Fuel will not leak out of the tank, so you do not have to drain the tank first, but there will be some fuel in the black hose that you disconnect, so be gentle with the hose once you disconnect it, and you may want to drain it into a can or something if you don’t want it to splash on you or your bike. Gasoline will dissolve some plastics, so just be cautious what you drain it into. A plastic container designed for mixing paint is a safe bet, or use an empty aluminum or tin can. The smaller hose is the vent hose and connects to the charcoal canister, the larger hose is the overfill drain hose and routes underneath the bike.
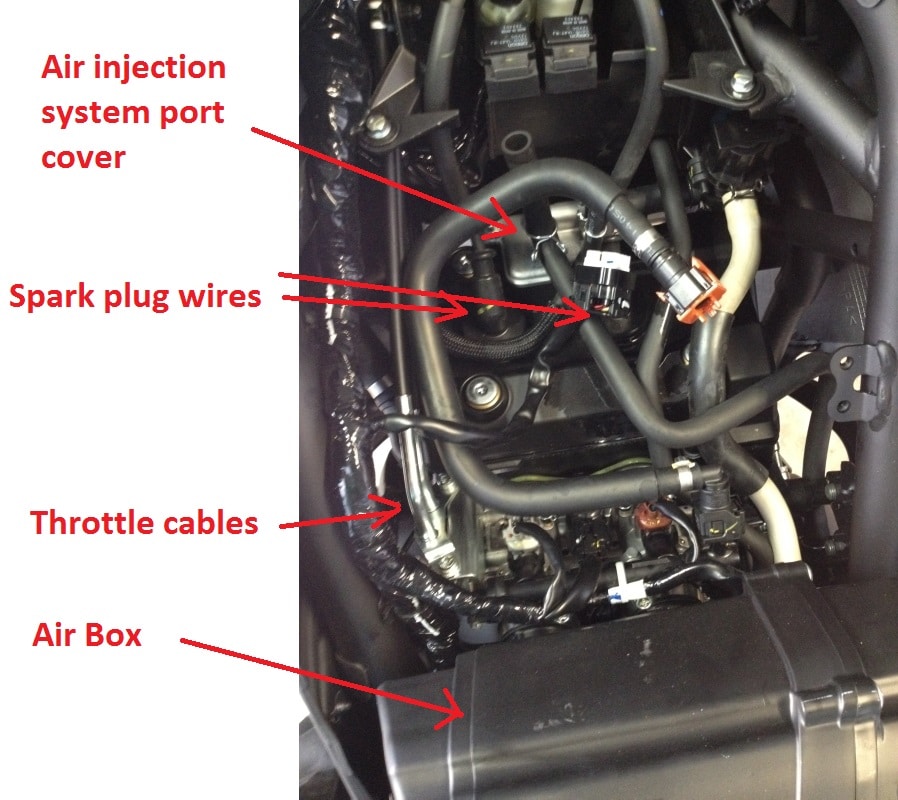
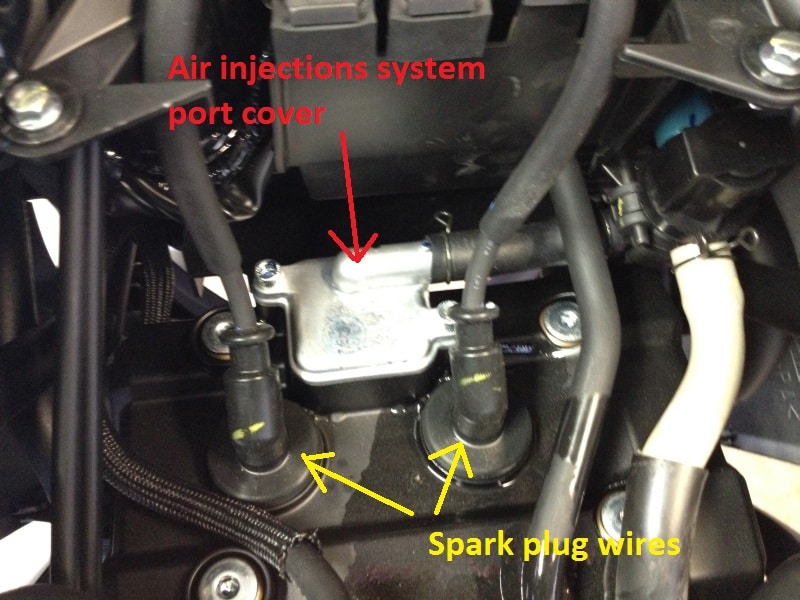
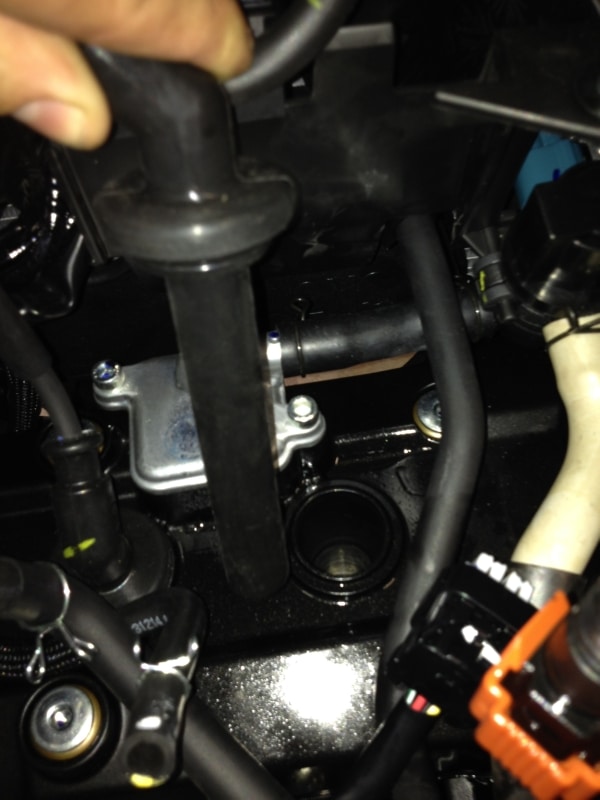
All done! From here you can easily access the spark plugs, air injection port cover (where you install the smog block off plate), throttle bodies, throttle cables, air box, and other important stuff 🙂


2 Comments to “ How to remove the gas tank from the Yamaha R3”
You must be logged in to post a comment.
Hi, do I need to to drain the tank before removing the fuel hose?
No, fuel won’t leak out from the tank, but a little will be in the black hose when you disconnect it, so be mindful of that and drain it into a can or something if you don’t want it to splash on you or your bike.