


Follow us on Instagram to see what we're up to!
 Read more +25 February 2021 in Kawasaki Ninja 400 / Z400
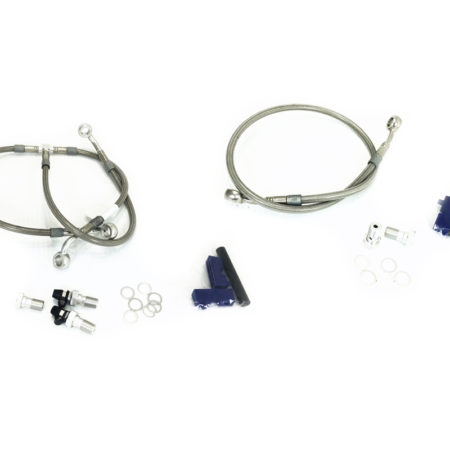
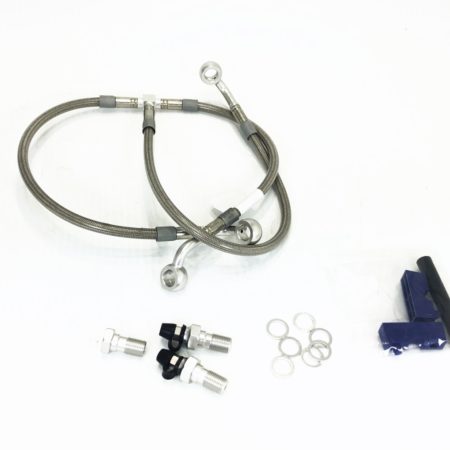
What’s up with the Kawasaki Ninja 400 / Z400 brakes?
The Ninja 400 / Z400 have decent enough brakes for street use, with their 310mm floating front disc. It’s larger in diameter than similar bikes like the Yamaha R3 (298mm). The OEM pads have what seems to be the standard “OEM feel” for budget oriented bike, very wooden, lacking any substantial bite, and requiring a
 Read more +24 February 2021 in Kawasaki Ninja 400 / Z400
** Kawasaki Ninja 400 / Z400 Critical Issues
The Kawasaki Ninja 400 and Z400 are awesome little bikes! Kawasaki made some advancements to the little bike scene offering a 400cc package that was just as lightweight (or lighter) and nimble as other 250cc and 300cc bikes. But like with anything that’s a brand new design, there are a few quirks that should be
 Read more +24 January 2021 in Yamaha R3 / MT-03
Suspension Spring Rate Chart for Yamaha R3 / MT-03
*Keep in mind, these are only general recommendations for spring rates to get you close for your weight. Optimum spring rate is affected by countless variables including riding style, preference, pace, track layout and surface finish, and bike geometry and suspension setup. Generally faster racers will prefer springs at the stiffer end of their range.
Read more +24 January 2021 in Kawasaki Ninja 400 / Z400Suspension Spring Rate Chart for Kawasaki Ninja 400 / Z400
*Keep in mind, these are only general recommendations for spring rates to get you close for your weight. Optimum spring rate is affected by countless variables including riding style, preference, pace, track layout and surface finish, and bike geometry and suspension setup. Generally faster racers will prefer springs at the stiffer end of their range.
Read more +24 January 2021 in Yamaha R3 / MT-03** Yamaha R3 / MT-03 Critical Issues
coming soon, address these things first!
 Read more +24 January 2021 in Yamaha R3 / MT-03
*** Top 5 Yamaha R3 / MT-03 Mods and Upgrades
coming soon!
Read more +24 January 2021 in Kawasaki Ninja 400 / Z400*** Top 5 Kawasaki Ninja 400 / Z400 Mods and Upgrades
coming soon.
 Read more +30 December 2019 in Press Release
Ultimate Motorcycling article on Norton Motorsports and the Ninja400R!
Moto Journalist Nic De Sena did a test ride with us comparing a stock Kawasaki Ninja 400 to our Ninja400R superbike at a trackday at Chuckwalla Raceway. Pretty cool article, thanks Nic!
 Read more +02 December 2019 in Kawasaki Ninja 400 / Z400
Kawasaki Ninja 400 / Z400 Clutch Slipping, Poor Shifting, False Neutrals, and Dropping Gears – Explained and Fixed!
The Ninja 400 / Z400 is an awesome little bike with a fantastic engine. But it is no secret by now that the Kawasaki Ninja 400 / Z400 has some issues with the clutch and shifting. No matter how many Kawi dealers tell you it’s normal for your clutch to slip on a bike with