SIGN IN YOUR ACCOUNT TO HAVE ACCESS TO DIFFERENT FEATURES

FORGOT YOUR PASSWORD?

FORGOT YOUR DETAILS?

AAH, WAIT, I REMEMBER NOW!
(858) 842-4595
  • Policies
  • My Account
  • LOGIN

Norton Motorsports

  • Shop by Bike
    • Aprilia
      • Tuono 660 2021+
      • RS 660 2021+
      • Close
    • KTM
      • RC390 / Duke 390
      • Close
    • Kawasaki
      • Ninja 250 / 300
      • Ninja 400 2018+
      • Ninja ZX-4RR 2023+
      • Z400 2019+
      • Kawasaki Ninja 500 2024+
      • Close
    • Ohvale
      • GP-0
      • GP-2
      • Close
    • Yamaha
      • MT-03 2020+
      • MT-07 / FZ-07 2015-2017
      • MT-07 2018-2020
      • MT-07 2021+
      • R3 2015-2018
      • R3 2019+
      • R7 2021+
      • Close
    • Suzuki
      • Suzuki GSX-8R
      • Close

    • View All
    • Close
  • Norton Built Motorcycles
    • Norton Racing Hotbodies GP Spec Race Bodywork Kit - Kawasaki Ninja 400 Z400 Ninja400R main Norton Motorsports GP Spec Kawasaki Ninja400R
    • 2019-04-28 18_00_05-2018 Ninja 400 Race Motorcycle from Ninja400R.com Norton Motorsports Kawasaki Ninja400R
    • 2019 yamaha yzf-r3 race bodywork Hotbodies Racing Norton Motorsports Norton Motorsports Race Spec Yamaha R3
    • IMG 2548 Edit Norton Motorsports Kawasaki Ninja ZX4RR Race Motorcycle
    • Close
  • Apparel, Gear, & Tools
    • Apparel
    • Riding Gear
    • Tools
    • Close
  • MY CART
    No products in cart.
  • Bike Build Write-ups
    • Aprilia RS 660 2021-
    • Kawasaki Ninja 400 2018- / Z400 2019-
      • Important ** Kawasaki Ninja 400 / Z400 Critical Issues
      • Top5 *** Top 5 Kawasaki Ninja 400 / Z400 Mods and Upgrades
      • Do you need a fuel controller with full exhaust ninja 400 Do you need a Power Commander for full exhaust on the Kawasaki Ninja 400?
      • featured image How to install an R6 throttle tube in the Kawasaki Ninja 400 / Z400
      • 49899087_301487663905591_4918556926305894400_n How to remove the front fender and rear fender of the Kawasaki Ninja 400
      • 2019-02-07 10_57_46-Clipboard How to remove the gas tank on the Kawasaki Ninja 400
      • IMG_4330_2 How to remove the OEM bodywork of the Kawasaki Ninja 400
      • open clutch Kawasaki Ninja 400 / Z400 (Ninja 500 / Z500) Clutch Slipping, Poor Shifting, False Neutrals, and Dropping Gears – Explained and Fixed!
      • Kawasaki Ninja 400 dyno horsepower Kawasaki Ninja 400 Exhaust Dyno Shootout!
      • CVR_3132_Sep1519_CaliPhoto Ninja 400 Electronics and GP Bodywork Test
      • Traxxion Dynamics Omni Fork Spring Kit Yamaha R3 2015-2018 Suspension Spring Rate Chart for Kawasaki Ninja 400 / Z400
      • Braketech Vs Galfer Rotor Brake Test Rocco Landers What’s up with the Kawasaki Ninja 400 / Z400 brakes?
      • Close
    • Ohvale GP-0 / GP-2
      • Important ** Ohvale GP-0 / GP-2 Critical Issues
      • OV001 Ohvale 190 5 Speed Shift Star Cap Ohvale 190 False Neutral and Miss Shift Problems – FIXED!
      • Close
    • Yamaha R3 2015-2018
      • Important ** Yamaha R3 / MT-03 Critical IssuesJanuary 24, 2021
      • Top5 *** Top 5 Yamaha R3 / MT-03 Mods and UpgradesJanuary 24, 2021
      • Yamaha R3 Annitori Quickshifter QS Pro Annitori Quickshifter QS Pro installed and beta tested on Yamaha R3June 24, 2015
      • Yamaha R3 415 chain kit horsepower Dyno tested: 520 vs. 415 chain and sprockets – Yamaha R3February 14, 2016
      • IMG_3869 How to bleed the brakes or flush the brake fluid on the Yamaha R3 / MT-03September 7, 2015
      • IMG_3896 How to change the front brake pads on the Yamaha R3 / MT-03September 11, 2015
      • R3GPShift How to change the Yamaha R3 / MT-03 to GP ShiftSeptember 7, 2015
      • DSCN2608_zpsqza81eb3 How to do an oil and filter change on the Yamaha R3 / MT-03August 16, 2015
      • IMG_3857 How to get more dash clearance for your clipons and brake line – Yamaha R3August 28, 2015
      • IMG_3630 How to install a BMC Race Air Filter in the Yamaha R3 / MT-03August 8, 2015
      • IMG_3846 How to install a stainless steel braided front brake line on the Yamaha R3 / MT-03September 7, 2015
      • img_6102 How to install a Yoyodyne slipper clutch in the Yamaha R3 / MT-03December 10, 2016
      • topdown vortex clipons How to install aftermarket clipons on the Yamaha R3 / MT-03March 26, 2016
      • IMG_4189 How to Install Hotbodies Race Bodywork on the Yamaha R3May 7, 2016
      • IMG_3965 How to install the Traxxion Dynamics Fork Damper Rod kit with Cartridge Emulators in the Yamaha R3 2015-2018January 16, 2016
      • IMG_4511 featured How to remove the emissions systems and install a block off plate on the Yamaha R3 / MT-03August 16, 2015
      • DSCN2484_zpsuqljyccu How to remove the front wheel from the Yamaha R3 / MT-03August 2, 2015
      • How to remove the fuel tank from the yamaha R3 How to remove the gas tank from the Yamaha R3April 23, 2015
      • IMG_3927 How to remove the kickstand from the Yamaha R3May 7, 2016
      • DSCN2189_zpsg2hs8ooe How to remove the rear wheel from the Yamaha R3 / MT-03August 2, 2015
      • Remove Side Fairings Yamaha R3 How to remove the side fairings from the Yamaha R3May 23, 2015
      • IMG_0167 How to remove the tail and taillight of the Yamaha R3April 21, 2015
      • how to remove the windscreen yamaha r3 How to remove the windscreen and upper fairing from the Yamaha R3May 4, 2015
      • IMG_3985 How to replace the fork seals on the Yamaha R3January 16, 2016
      • IMG_3719 Installed: Hotbodies Color Form Race Bodywork – Yamaha R3 2015-2018August 26, 2015
      • Yamaha R3 Modified rear brake rotor, lightened machined rotor Lightweight Rear Brake Rotor for Yamaha R3October 1, 2015
      • IMG_4463 Paint is done, heading to 5zero4 Designs next weekend to install the graphicsDecember 14, 2015
      • Traxxion Dynamics Omni Fork Spring Kit Yamaha R3 2015-2018 Suspension Spring Rate Chart for Yamaha R3 / MT-03January 24, 2021
      • Yamaha R3 Woodcraft 1.5 rise clipons What are the best clipons for the Yamaha R3?March 24, 2016
      • yamahaR3_raceconcept_rearsets_gold_fitR1 What are the best rearsets for the Yamaha R3?March 26, 2016
      • Yamaha R3 Exhaust Test Superbike Dyno horsepower Norton Motorsports Yamaha R3 / MT03 Exhaust Dyno Test and Superbike BuildJune 6, 2019
      • 2015 yamaha r3 exhaust header muffler weight Yamaha R3 OEM exhaust weight, headers, muffler, slip-on, heat shieldJuly 3, 2015
      • Close
    • Close
  • Dyno Testing
    • Aprilia RS660 Dyno Testing
    • Kawasaki Ninja 400 / Z400
      • Kawasaki Ninja 400 dyno horsepower Kawasaki Ninja 400 Exhaust Dyno Shootout!September 2, 2019
      • Do you need a fuel controller with full exhaust ninja 400 Do you need a Power Commander for full exhaust on the Kawasaki Ninja 400?September 2, 2019
      • Close
    • Yamaha R3 / MT-03
      • Yamaha R3 415 chain kit horsepower Dyno tested: 520 vs. 415 chain and sprockets – Yamaha R3February 14, 2016
      • Yamaha R3 Exhaust Test Superbike Dyno horsepower Norton Motorsports Yamaha R3 / MT03 Exhaust Dyno Test and Superbike BuildJune 6, 2019
      • Close
    • Yamaha R7 / MT-07
    • Close
  • Other Cool Stuff
    • Power Commander vs Bazzaz vs ECU Flash vs aRacer Race ECU Power Commander vs. Bazzaz vs. ECU Flash vs. aRacer Race ECU
    • Woodcraft Toe Guard Yamaha R3 Woodcraft Shark Fin Toe Guard Modification Yamaha R3 / Kawasaki Ninja 400
    • Track_Day_TTD_2015_Thompson_8-24-15-2195-sm-300×200 5 Reasons Why Roadracers Give Up Street Riding
    • modified rear brake rotor rev a Reducing weight on a race bike and the different types of weight
    • video thumb Tire Shootout for Small Sport Bikes by Ari Henning
    • IMG_5091 Race Bike Designs, Graphics, and Paint Jobs
    • thumb Kawasaki Ninja 300 vs. KTM RC390 – Video Review
    • Close
  • Press Release
  • Race / Ride Reports
  • Race Team

How to replace the fork seals on the Yamaha R3

by Norton Racing / 2016, January 16 / Published in Yamaha R3 / MT-03

This post will cover how to change the fork seals in the Yamaha R3 and how to replace the fork oil.

This topic is very similar to my writeup on ‘how to install cartridge emulators in the forks of the Yamaha R3’, but because it will be a more common topic, I decided to split off the specific info into a separate post.


Tools you will need for this installation are:
new fork seals
large adjustable wrench or 22 mm socket
5mm allen wrench
6mm allen wrench
8mm socket
10mm socket
14mm deep socket
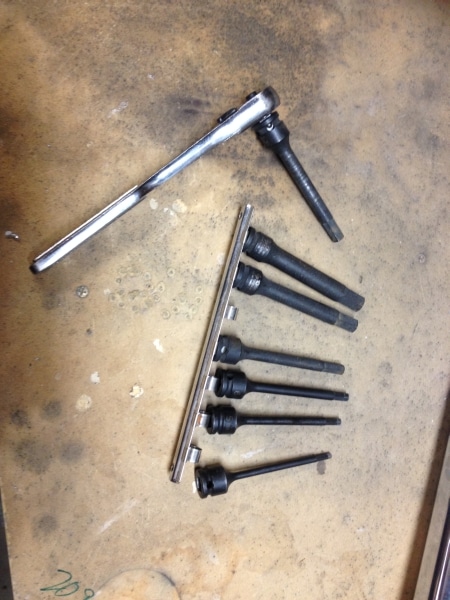
8mm extended allen socket (I have a set of these from Grey Pneumatic that I use CONSTANTLY when I am working on a bike, any time I need an allen wrench.  These are impact driver sets so they are extremely hard and durable tools, I highly recommend getting this set, you will love having it):
metric set:  and here’s the standard set: 

*possibly an impact driver, cordless or pneumatic will work fine, I needed one
aluminum or plastic v-groove vise jaws or vise jaws cut to 41mm to clamp the fork legs.  You can also use the OEM clipons (if you have replaced them) to clamp the fork leg and then just clamp the clipon in the vise.  SV650 clipons are also 41mm.  I have a set of these magnetic aluminum and plastic jaws that I use for stuff like this, got them for like $15 from amazon:

heavy fork seal grease, here’s a couple good ones from Race Tech and KYB:

oil height gauge, if you don’t have an oil height gauge, this simple one from Motion Pro or Pit Posse is pretty much the standard and is very inexpensive:

1 liter of fork oil (10 weight is stock), 1 liter is just enough if you don’t spill

a fork seal driver, there are instructions below for making your own from PVC pipe from Home Depot

a plastic tub to catch oil


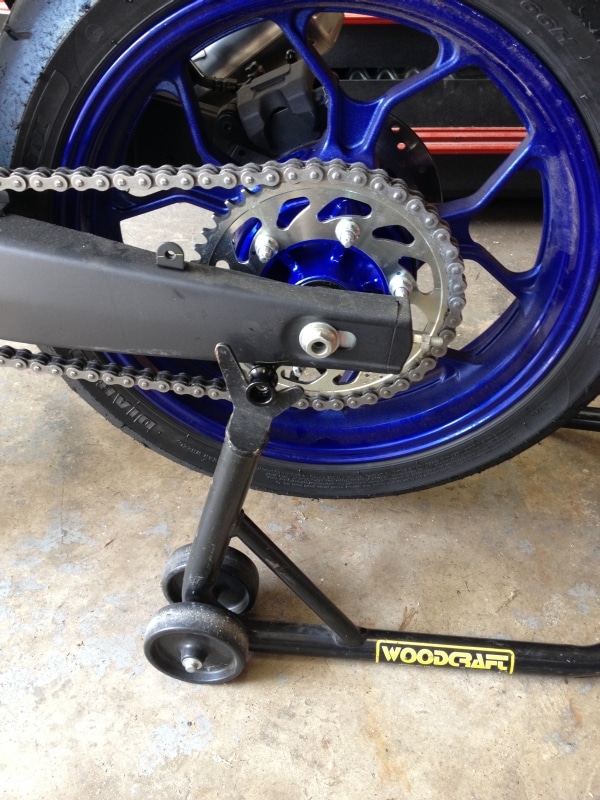
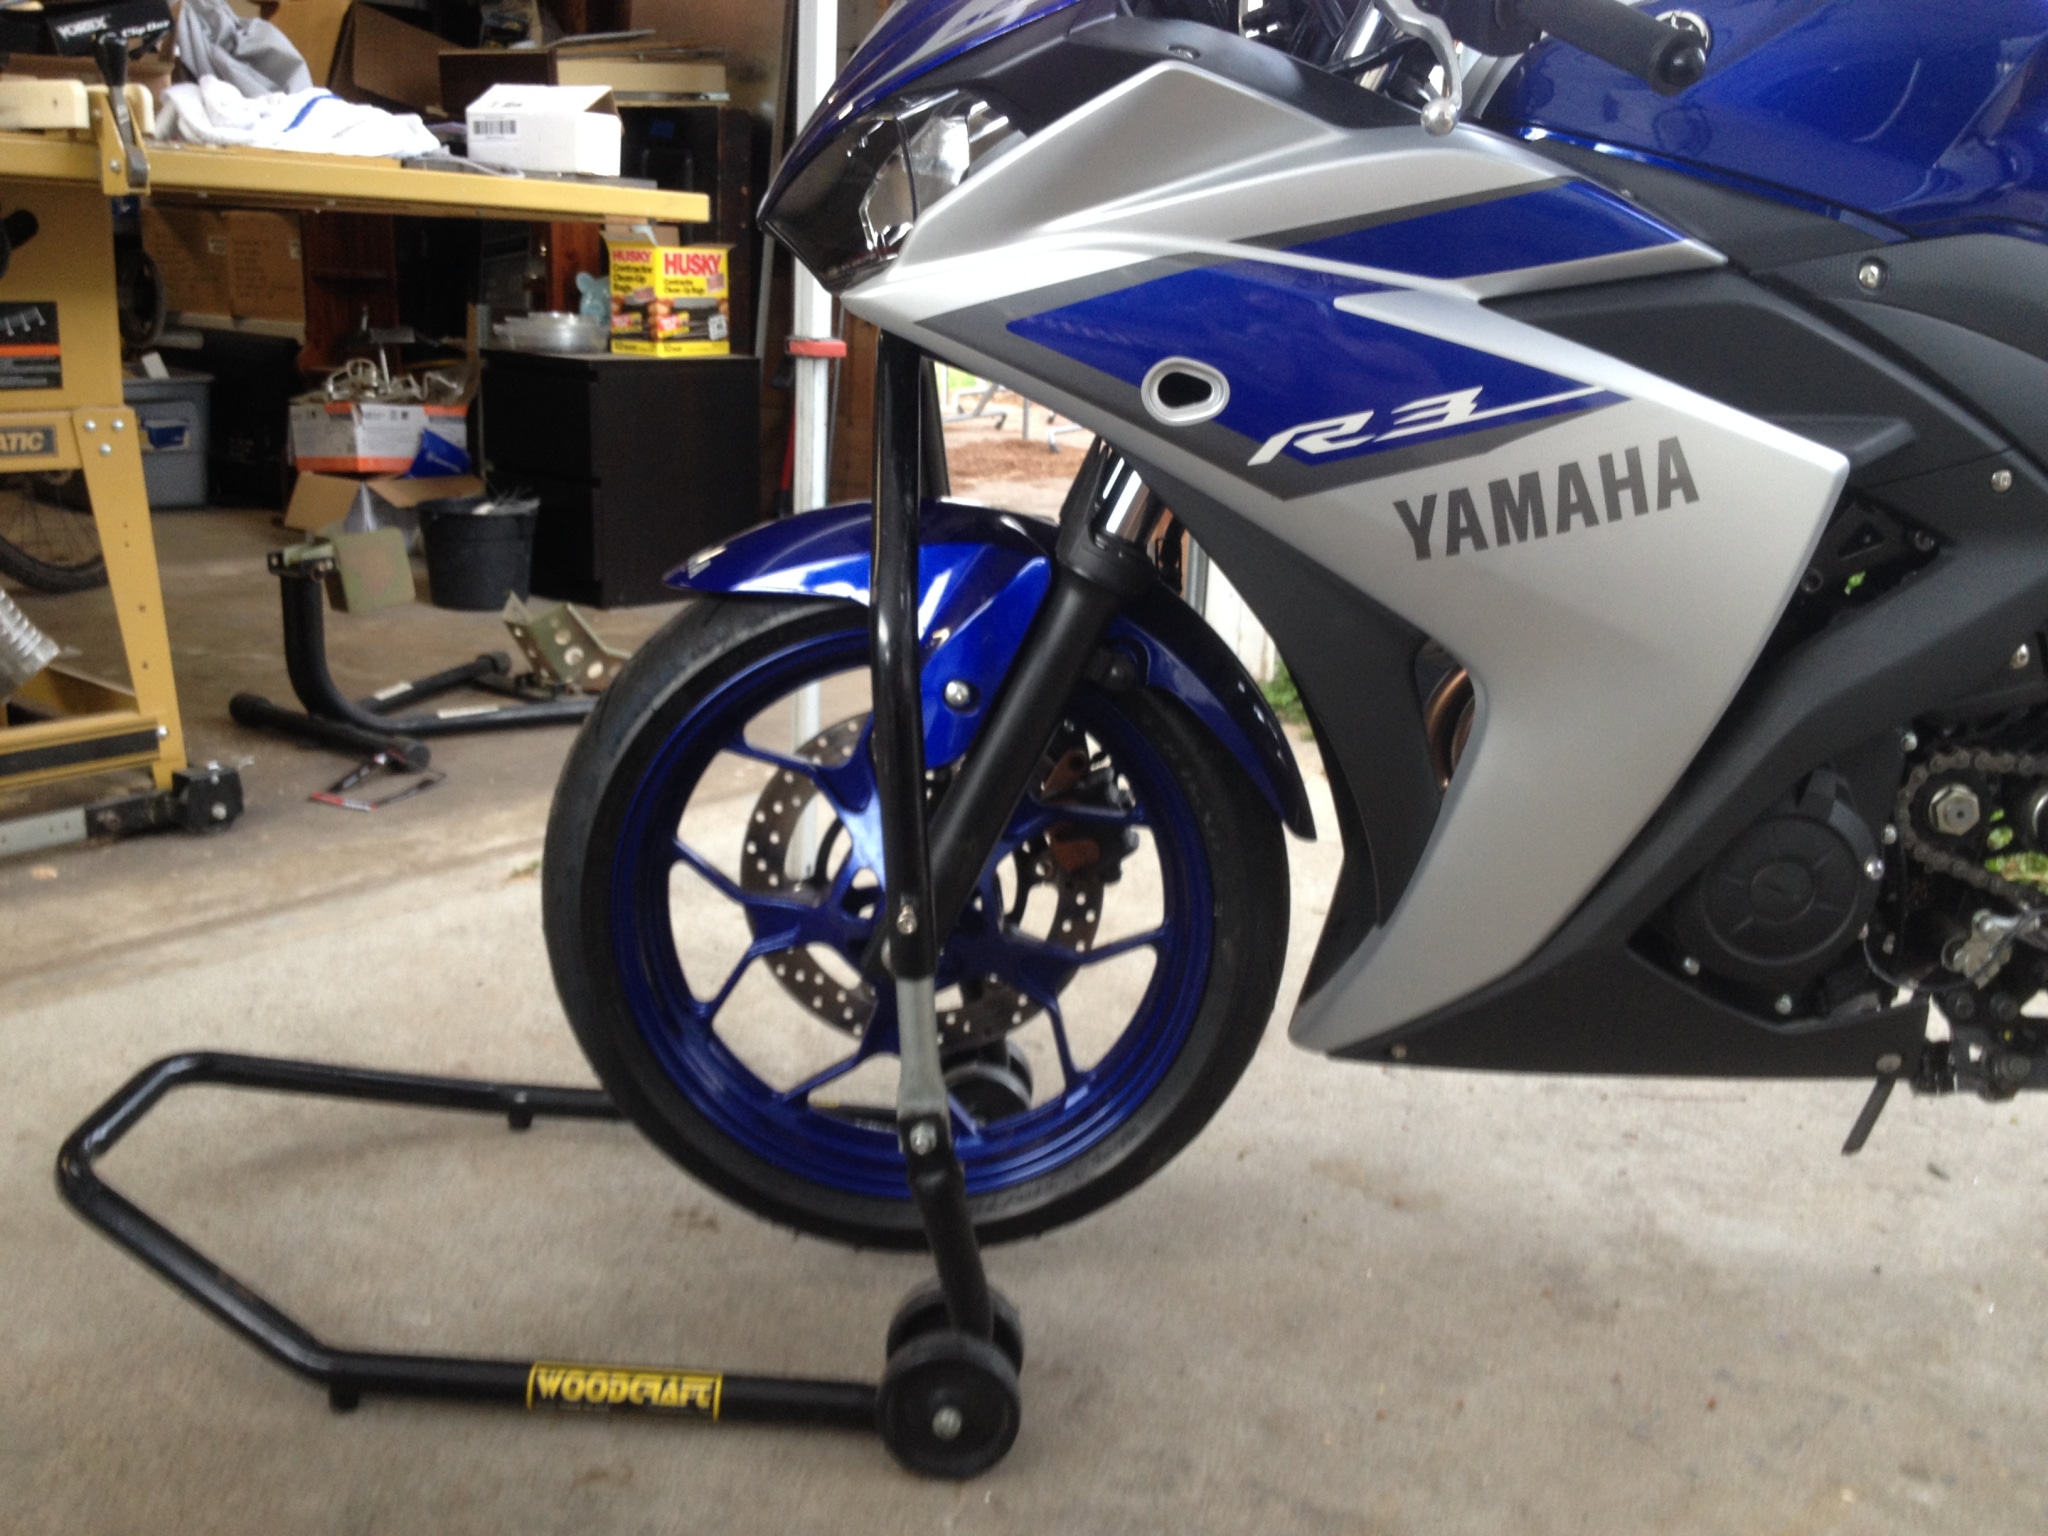
Step 1:  Put your bike on a rear stand, then raise the front using a triple tree stand.  You have to use a triple tree stand and not a fork stand because you have to remove the forks.  Never use a front stand by itself!  Always support the rear with a rear stand first, then lift the front with a front stand.

Yamaha R3 swingarm spools aluminum Vortex Racing IMG_3458


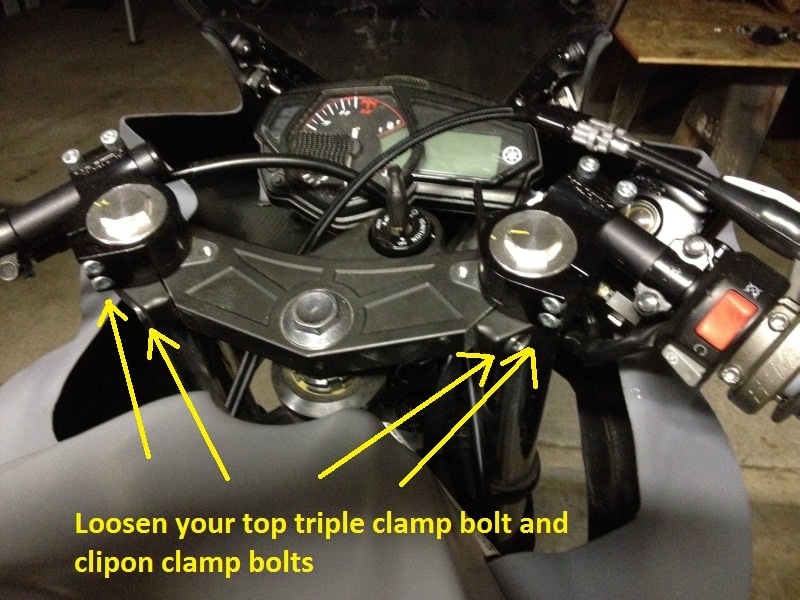
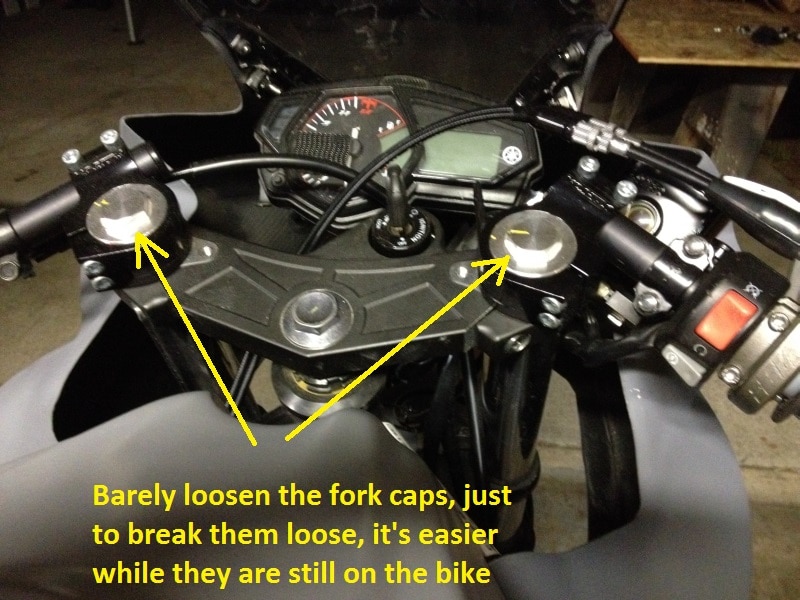
Step 2:  Loosen the upper triple clamp and your clipons (if you have OEM clipons or Vortex clipons, they will be on top of the triple clamp, if you have Woodcraft clipons, they will likely be below the triple clamp), then use the large adjustable wrench or 22 mm socket to break loose the fork cap.  Only break it loose a fraction of a turn!!!  It shouldn’t be very tight, but it’s still easier to break loose while the forks are still on the bike.  Do not loosen it all the way!!!

IMG_3966

IMG_3966_2


Step 3:  Follow my instructions here to remove the front wheel.  Once you remove the brake caliper, wrap it with a rag and zip tie it to the lower triple clamp so it is out of your way and not dangling.


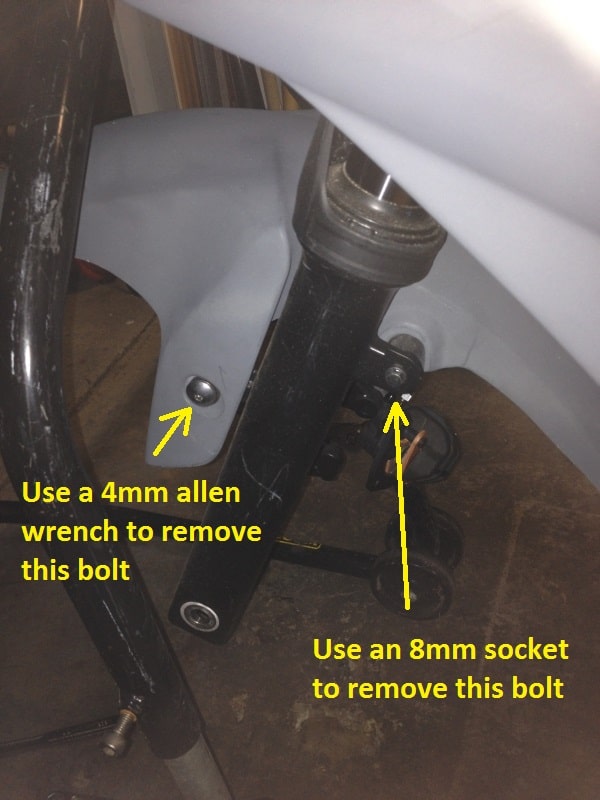
Step 4: Remove the front fender by removing the 2 rear bolts with an 8mm socket and the 2 front bolts with a 4mm allen wrench, then gently squeezing the sides together to slide it out between the forks:

IMG_3969


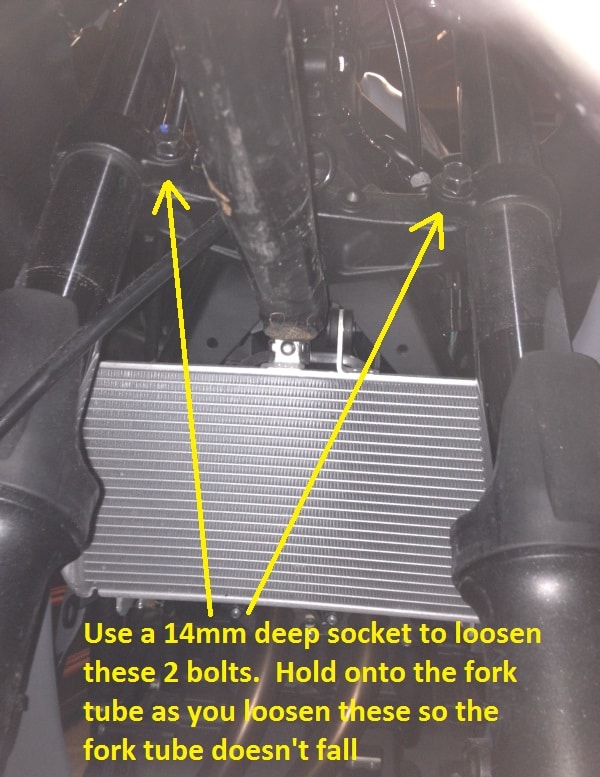
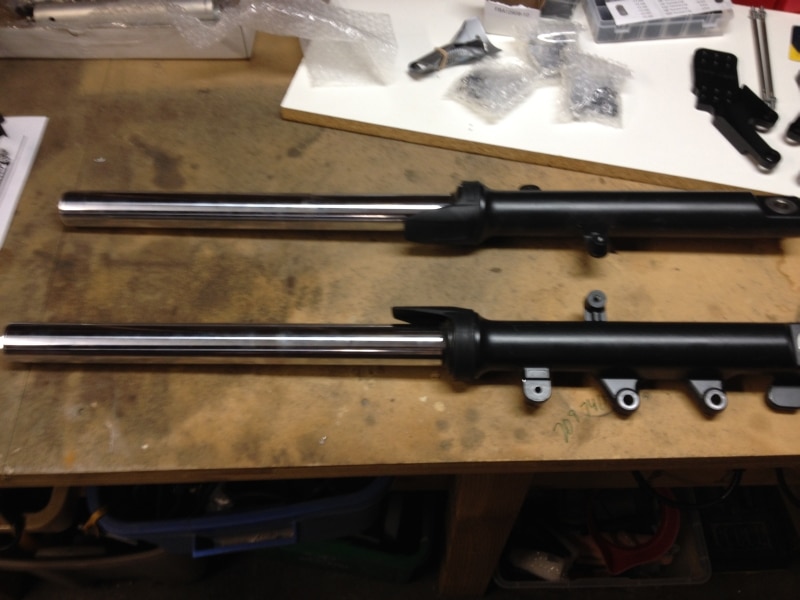
Step 5:  Once the wheel and fender are removed and the brake caliper is secured out of your way, use a 14mm deep socket to break loose the lower triple clamp bolt on one fork tube.  This bolt can be very tight so you may want to have someone hold the bike secure while you break this bolt loose.  Be careful not to knock the bike off the stands.  After you break it loose, hold on to the fork tube while you loosen the bolt until the fork slides free.  Slide the fork out of the bottom of the triple clamps and lay it on the bench.  Remove the other fork leg the same way.

IMG_3970

IMG_3971

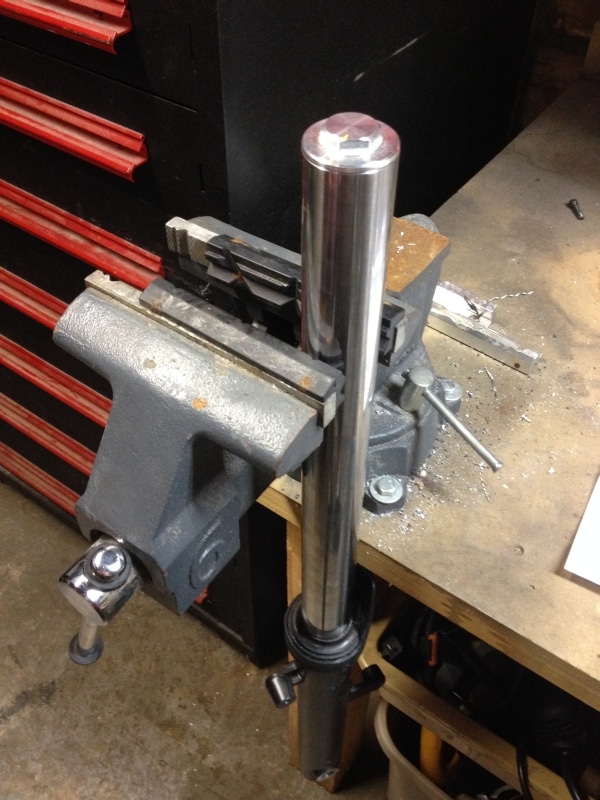
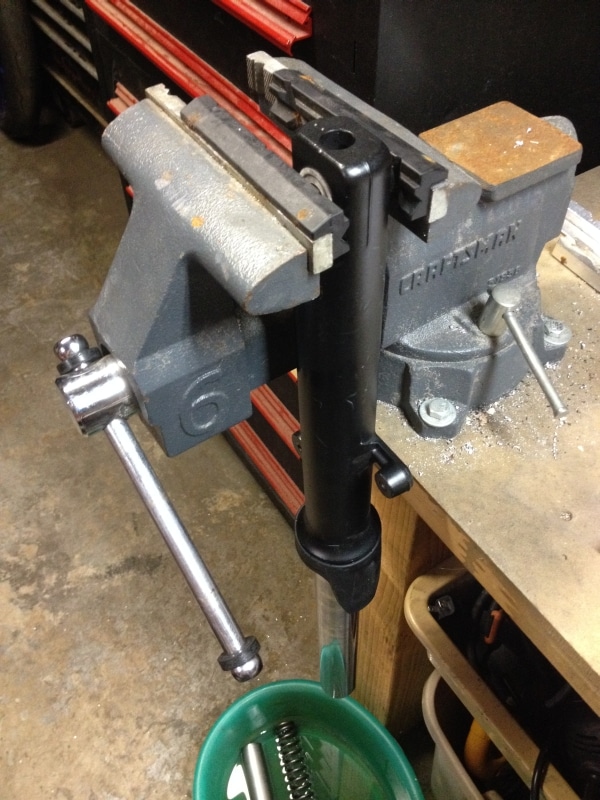
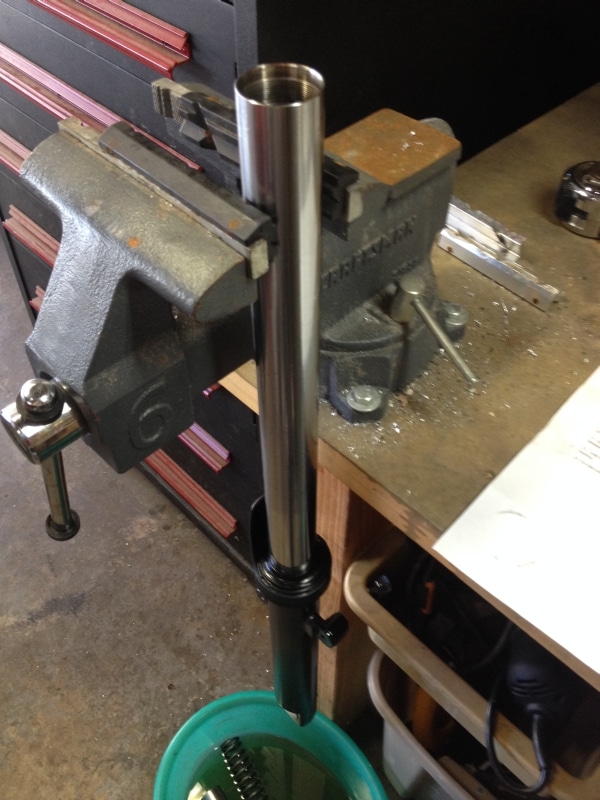
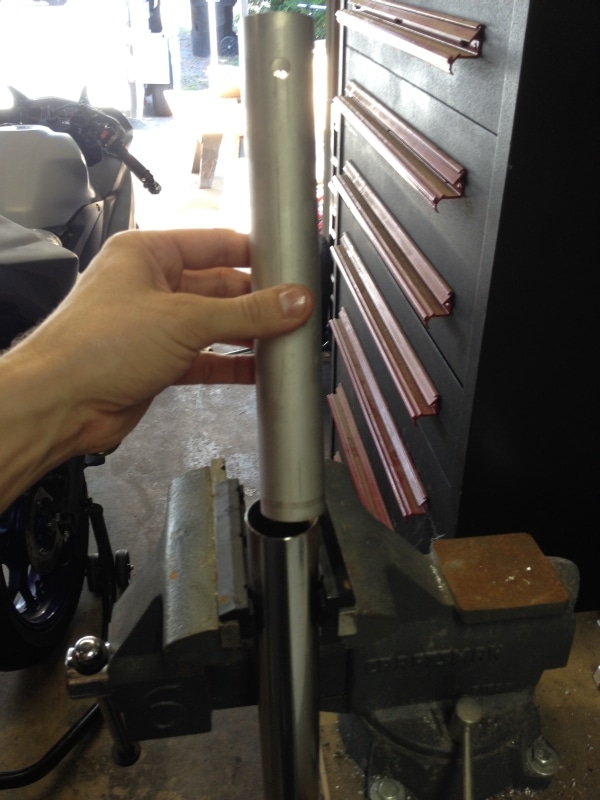
Step 6:  Grip the forks in a vise about 4 inches from the top in plastic or aluminum vise jaws so you don’t damage the fork tube.  It will help keep the fork leg from spinning in the vise if you clean the fork leg with a solvent such as acetone to remove any oil residue first.

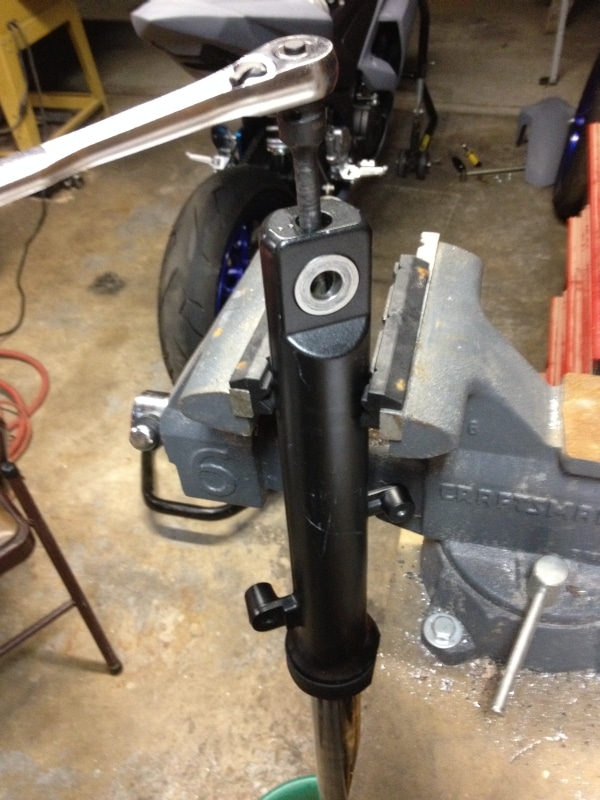
You can also use an old 41mm clipon to hold the fork and clamp the clipon bar in a vise (such as the ones from your R3 or SV650 if you have installed aftermarket clipons).  Use a 22 mm socket or adjustable wrench to remove the fork cap.  Use downward pressure as you unscrew the fork cap as it is under a little pressure from the fork spring.

Yamaha R3 remove fork caps 22mm Yamaha R3 remove fork caps 22mm


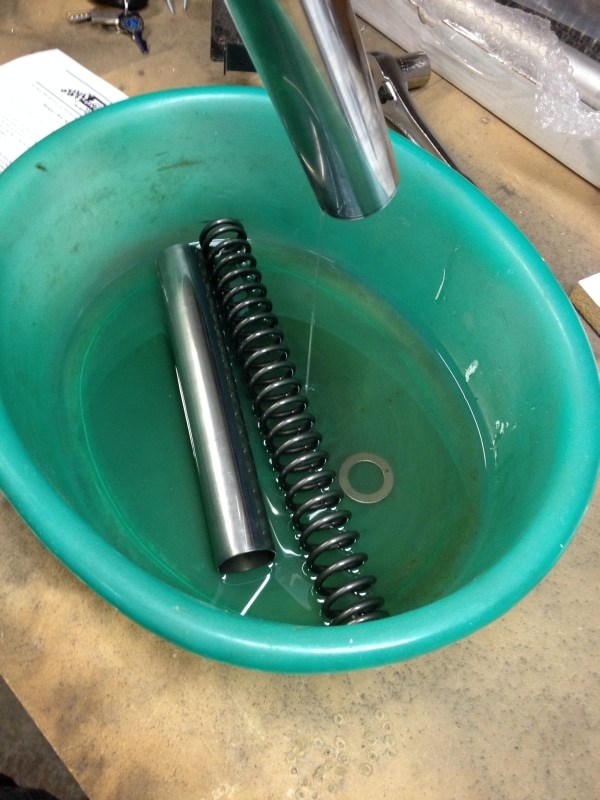
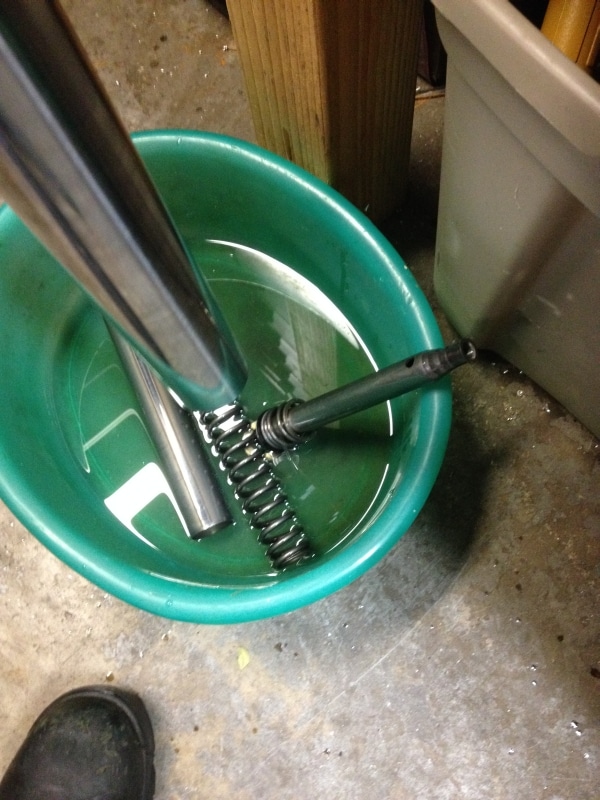
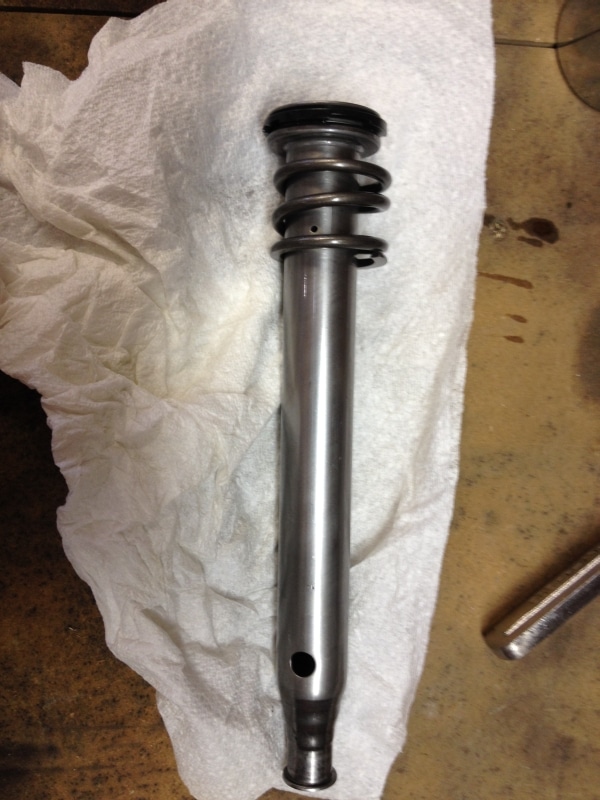
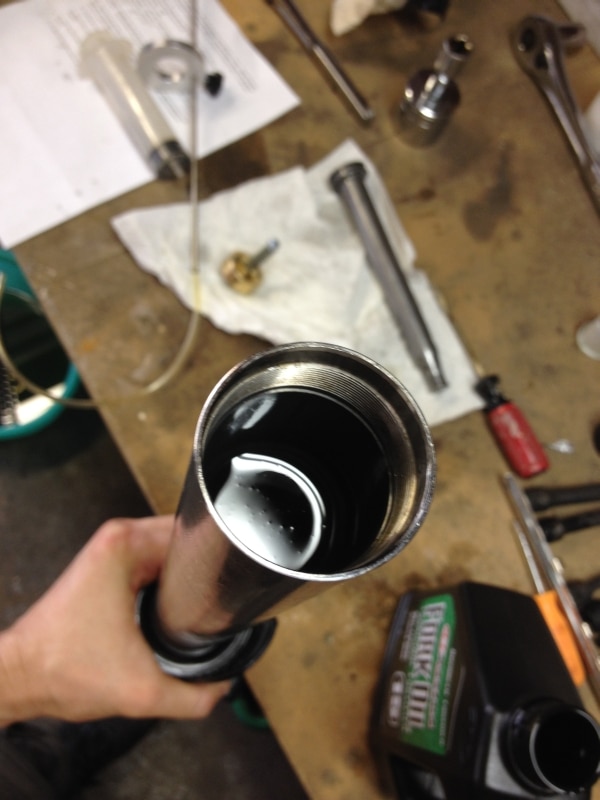
Step 7:  Dump out the fork oil, stock spacers, washer, and springs into a plastic tub.  You can clamp the fork upside down in the vise above the plastic tub and let it drain for a few minutes to get most of the oil out.

IMG_3974 IMG_3975


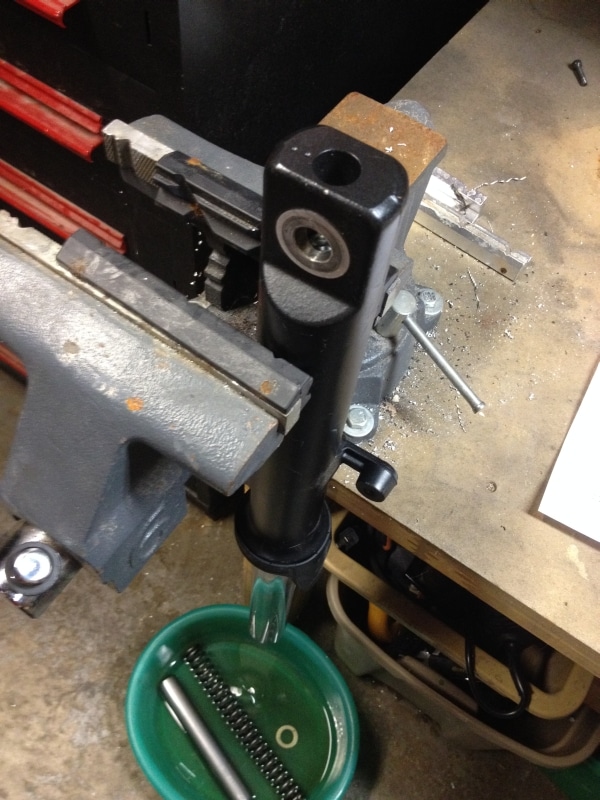
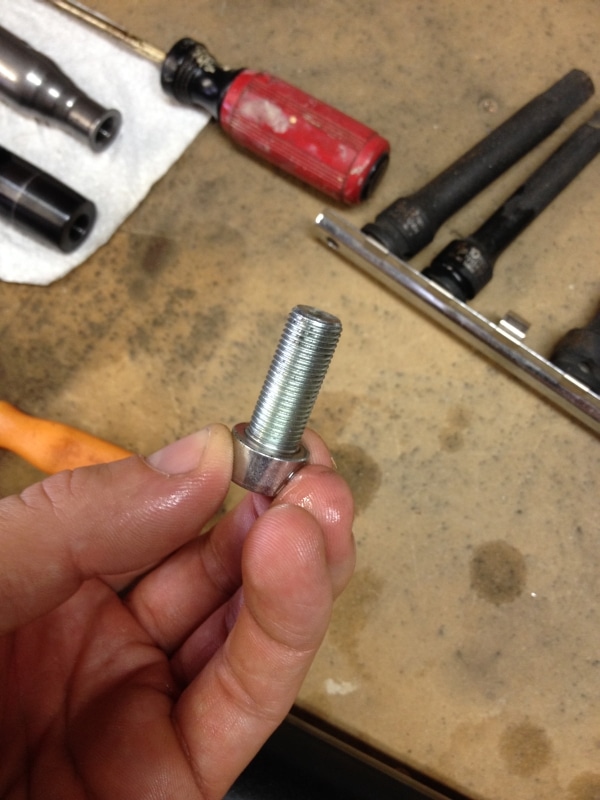
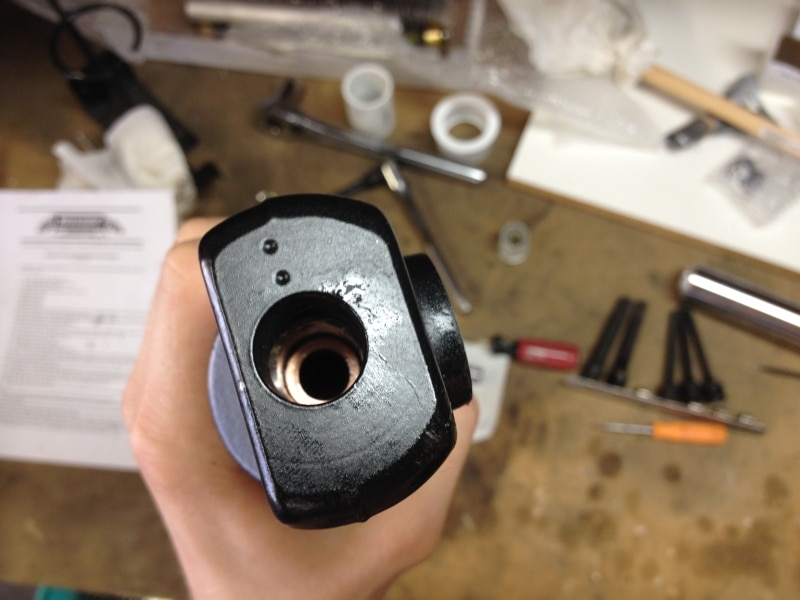
Step 8:  Clamp the fork leg in the vise by the flat end where the wheel mounts or across a caliper mount so it doesn’t spin in the vise and use an extended 8mm allen head socket to remove the bottom bolt.  Use the proper tool and be careful not to to strip the bolt.  The damper rod and top out spring will now fall out.  Take care of the bolt and crush washer that come out, you will have to reuse them.  The crush washer may stick to the bottom of the fork tube, remove it and keep it with the bolt.  Clean the locktite off the bolt, washer, and bottom of the fork tube.

IMG_3976

IMG_3978 IMG_3977

IMG_3979 IMG_4020 IMG_4023


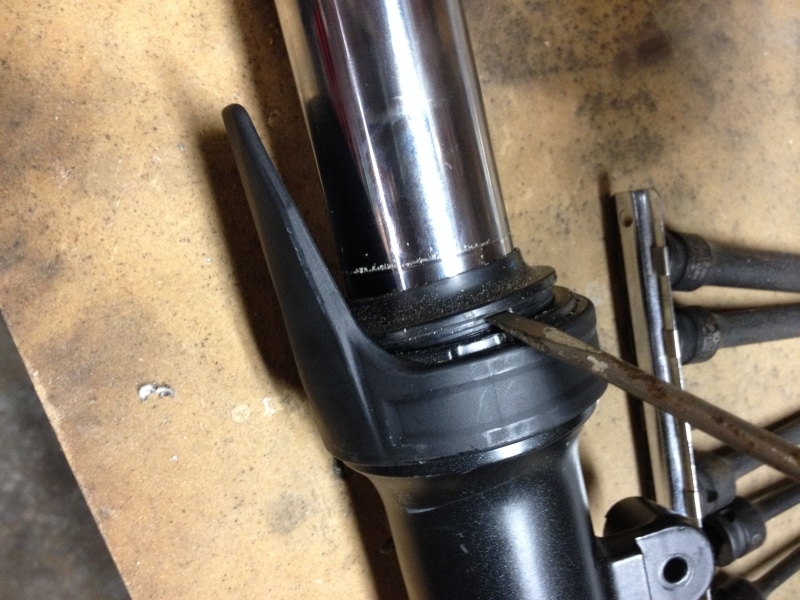
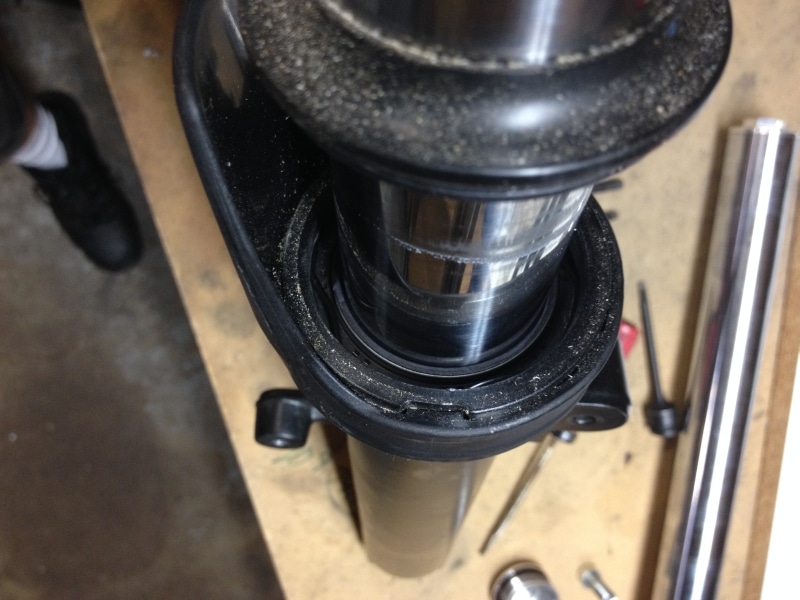
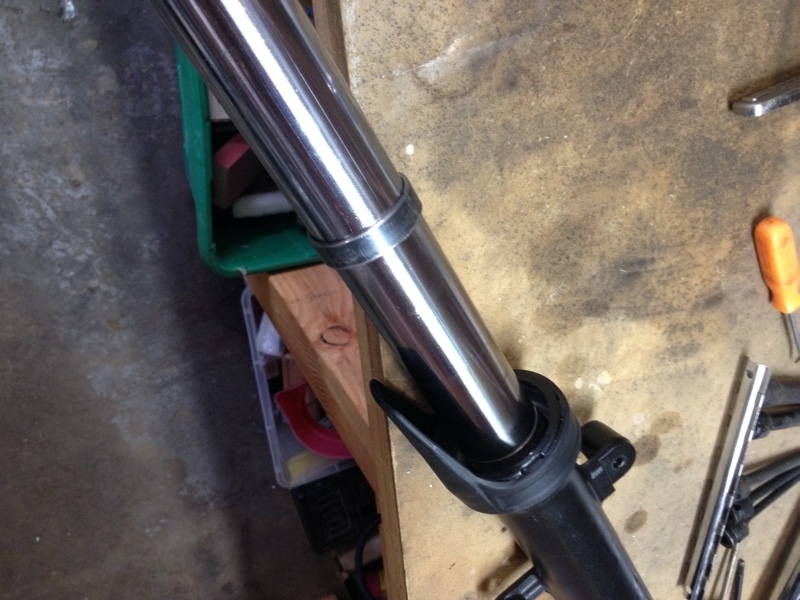
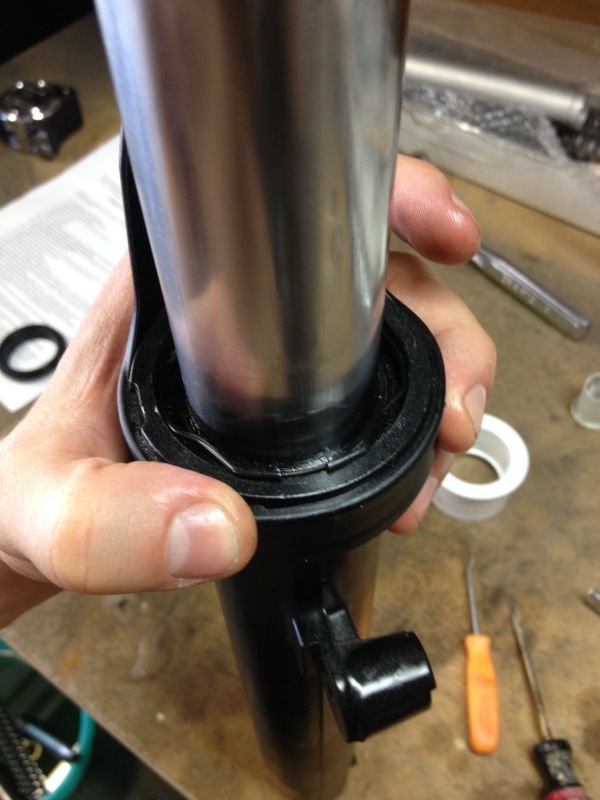
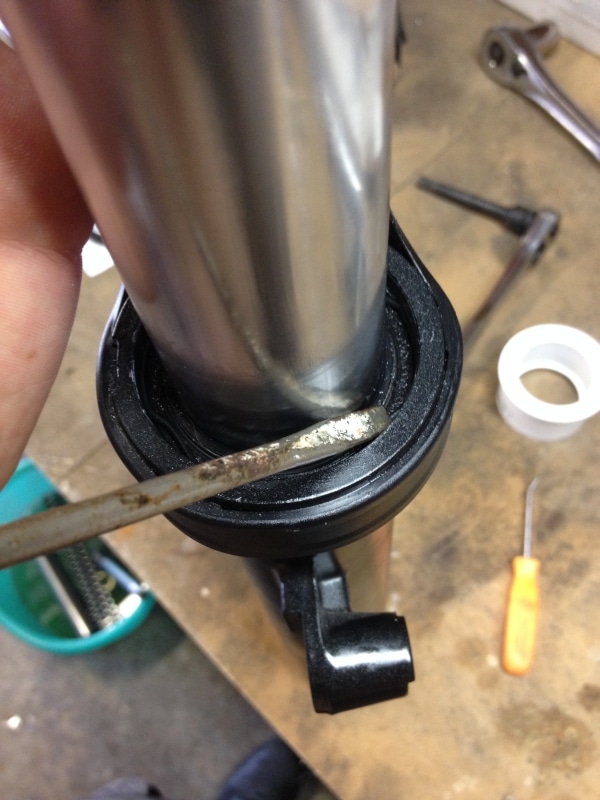
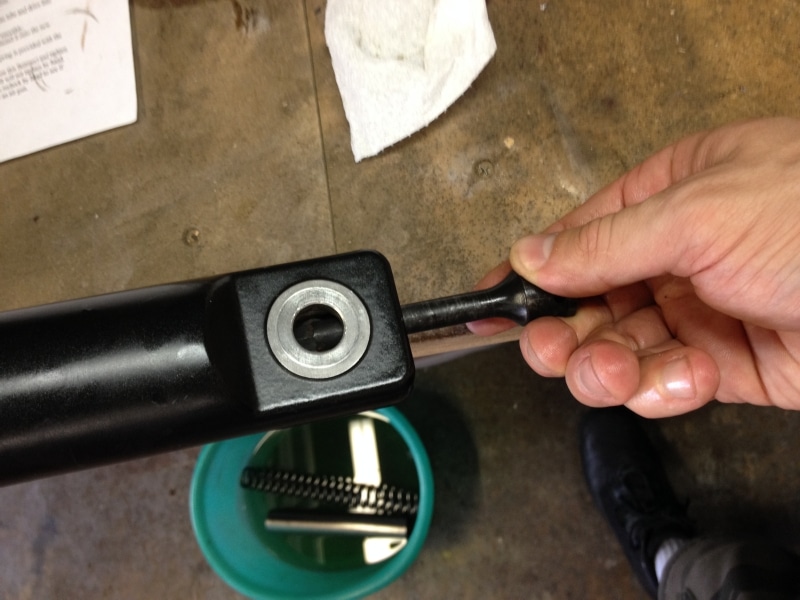
Step 9:  Gently pry up the dust seal with a small flat blade screwdriver to expose the retainer clip underneath.  Pry one side, then the other side, working your way around so you don’t damage the seal.

IMG_3980 IMG_3981


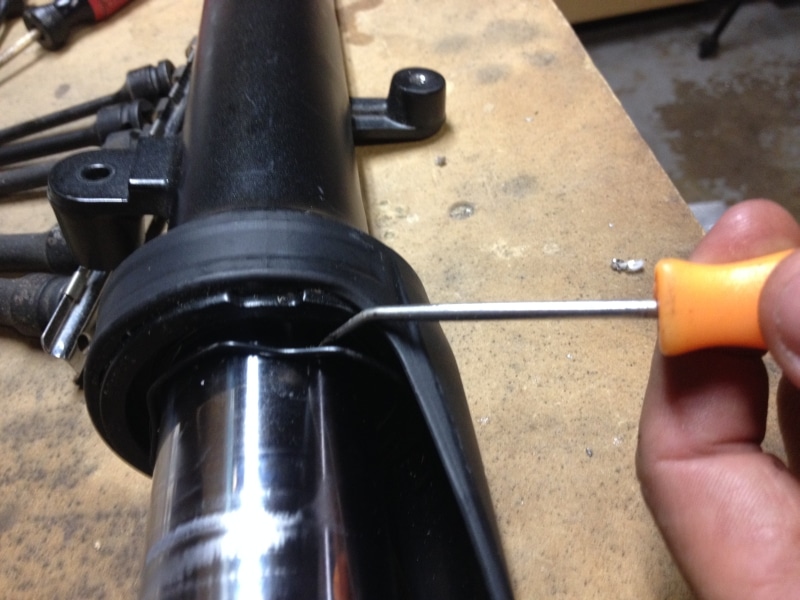
Step 10:  Use a small pick to pry out the retainer clip.

IMG_3982 IMG_3983


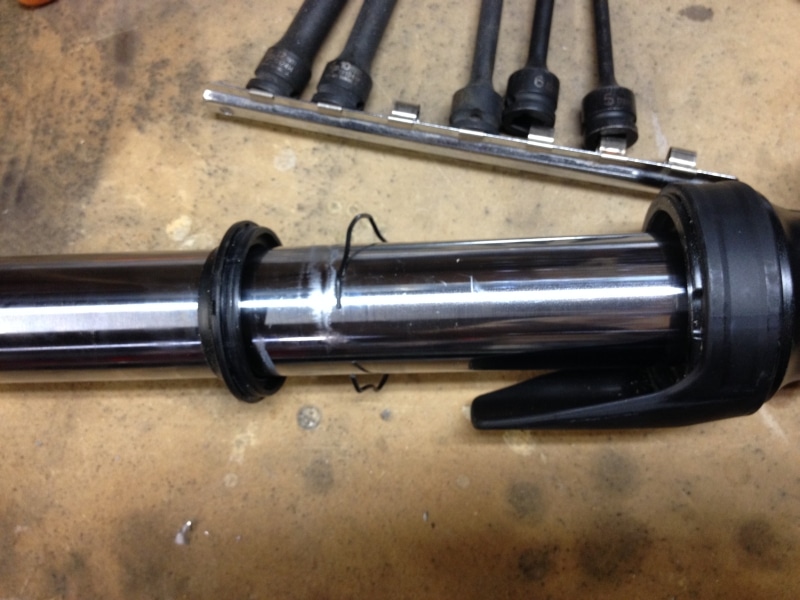
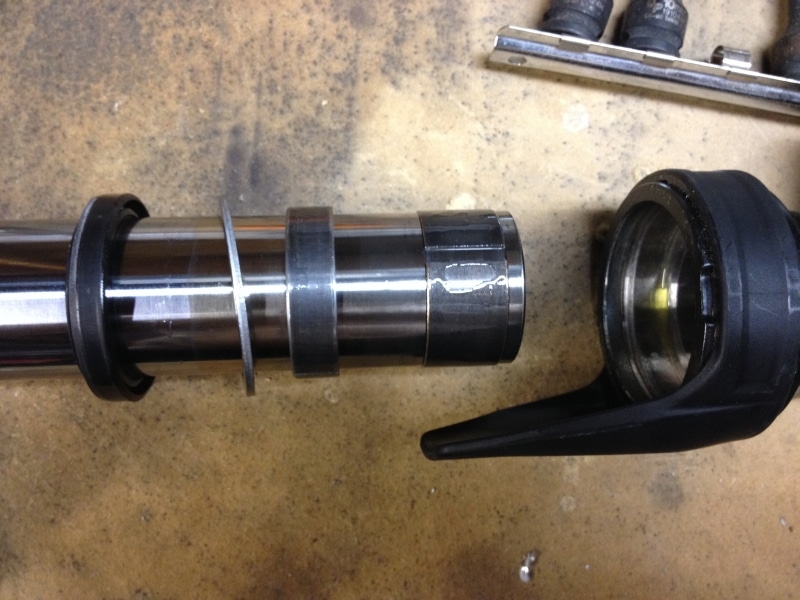
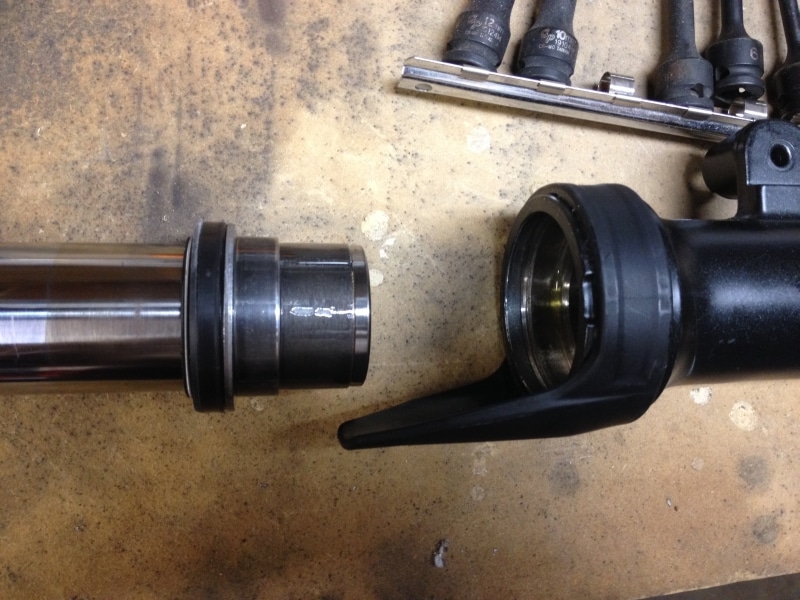
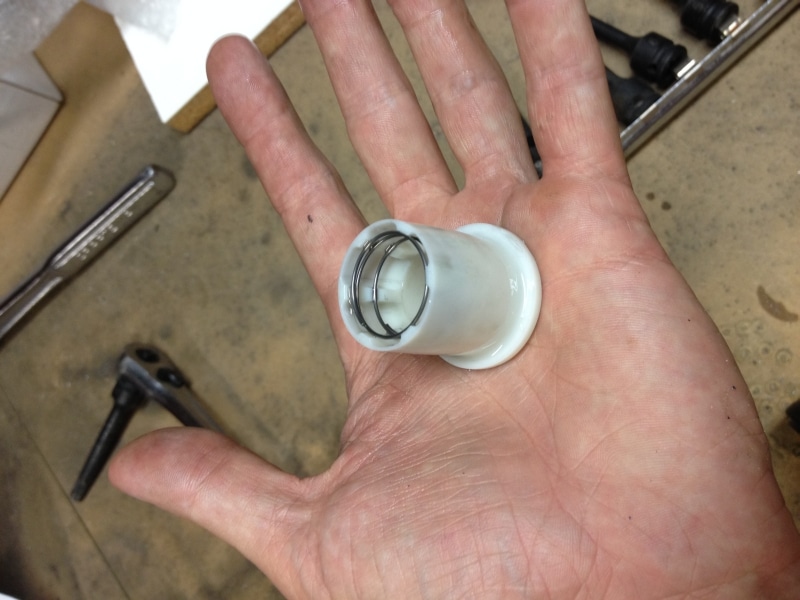
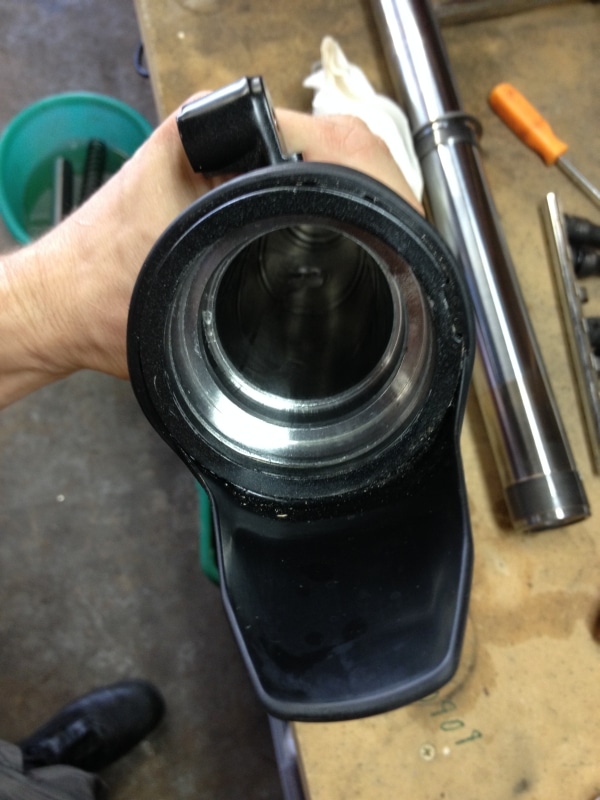
Step 11:  Once the retainer clip is free, the fork seal is the only thing holding the upper fork leg together with the lower fork leg.  Slide the upper fork leg into the lower, then quickly slide it out until it bangs against the fork seal.  Use the fork leg like a slide hammer to pound out the fork oil seal and separate the upper and lower fork legs.  Clean all parts with contact cleaner or solvent including the inside of the lower fork leg where the oil seal sits.  Be careful not to lose the white plastic hydraulic bottom out cone from the bottom of the fork leg.  If it comes out, put it back in flange side first, so the flange side rests against the bottom of the fork.  While you have the fork tubes separated, it’s a good idea to check and be sure they aren’t bent before you reassemble everything.

IMG_3984 IMG_3985 IMG_3986 IMG_3995


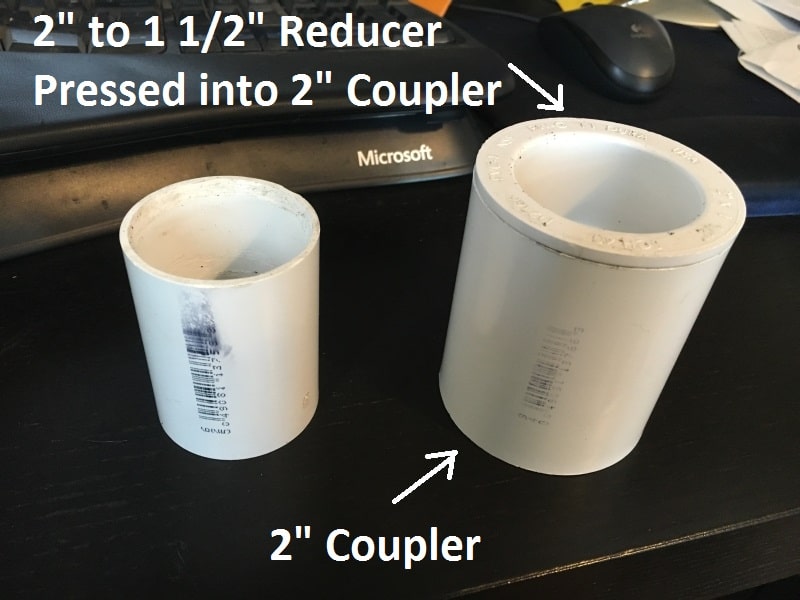
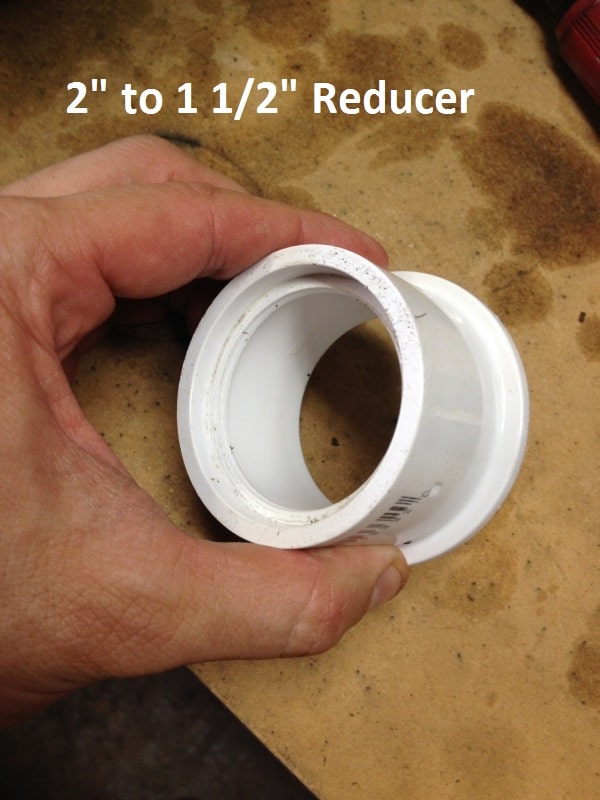
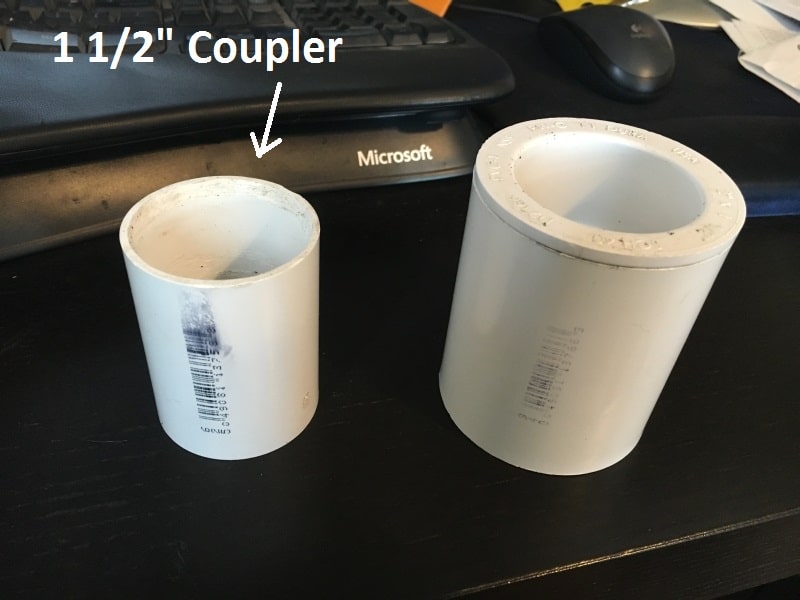
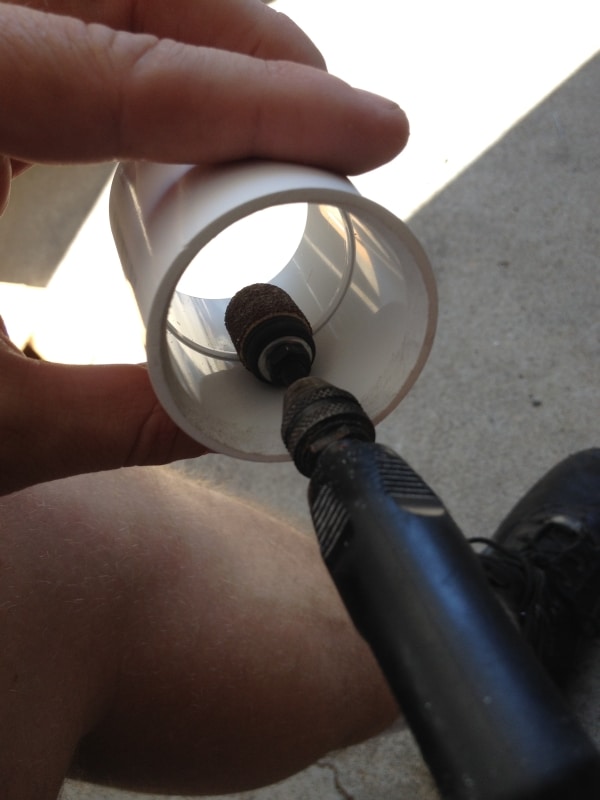
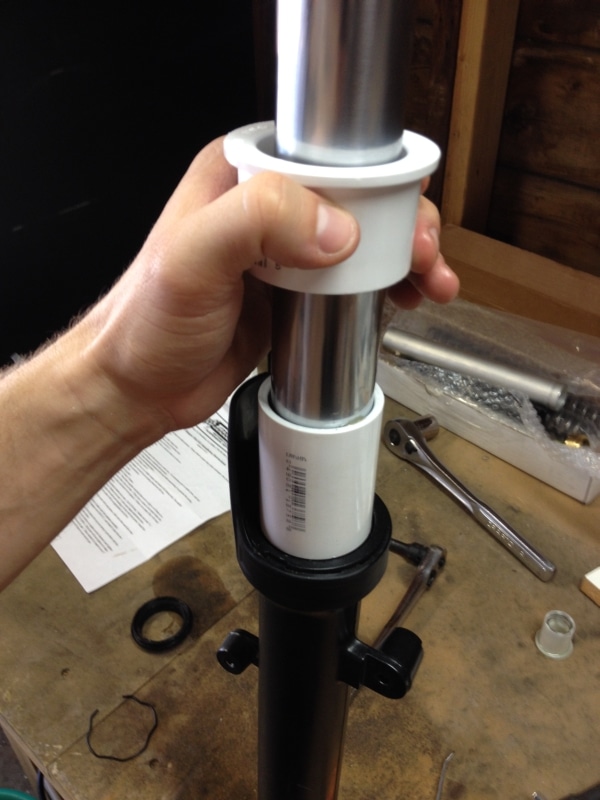
Step 12:  At this point, replace the fork seals with new ones.  Grease the fork oil seal (see below) and slide it back over the upper fork tube leg, and slide the upper fork tube leg with seal back into the lower fork leg and seat the seal into the top of the lower fork leg.  You will need a fork seal driver to driver the seal flush into the lower fork leg.  There are tons of different versions of home made fork seal drivers posted around the internet that you will find if you do a google search for home made fork seal driver, most of them are made from PVC pipe.  I went to Home Depot and picked up a couple PVC pieces to make my own.  I used a 1 1/2″ coupler as my driver and a 2″ to 1 1/2″ reducer as my hammer.  It was the quickest, simplest solution I could come up with.  It worked fine, but wasn’t the easiest to use (hurt my hand a little slide hammering).  In this photo, I have added a 2″ coupler connected to the 2″ to 1 1/2″ reducer to make the area to hold a little larger.  This, combined with thick gloves, and I think this will work fine for occasional use.  I had to dremel out the center dividing lip of the 1 1/2″ coupler, and grind a chamfer on the inside edge so it sat correctly on the fork seal.

IMG_4576 r IMG_4050 r IMG_4576 rs IMG_3990 IMG_3998

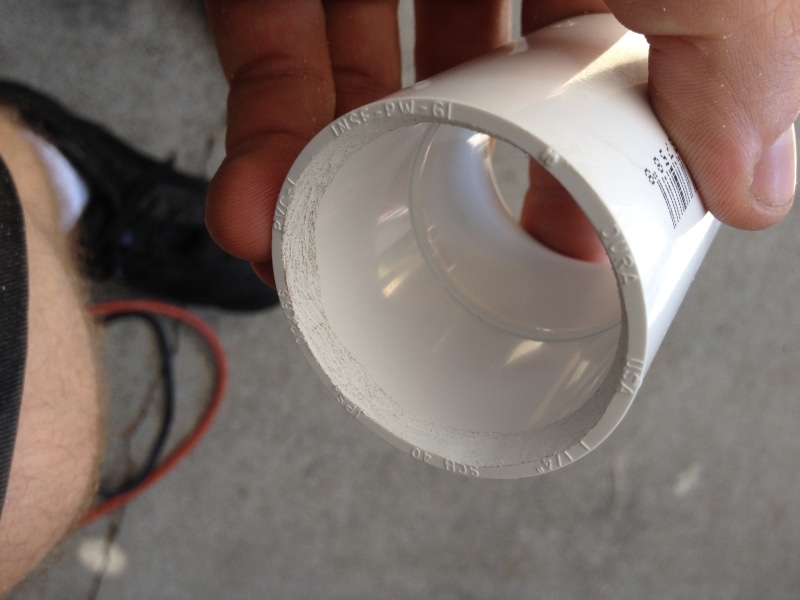
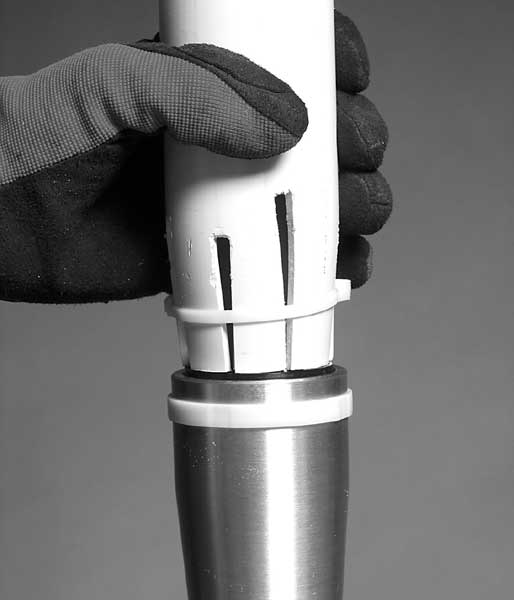
Here’s another option I saw online made from a small section of PVC.  For this to work, you will have to use 2″ PVC pipe so when you slot the end, you can compress it with a zip tie or hose clamp to 41 mm (1.61″):

Forkseal-Step8-lg

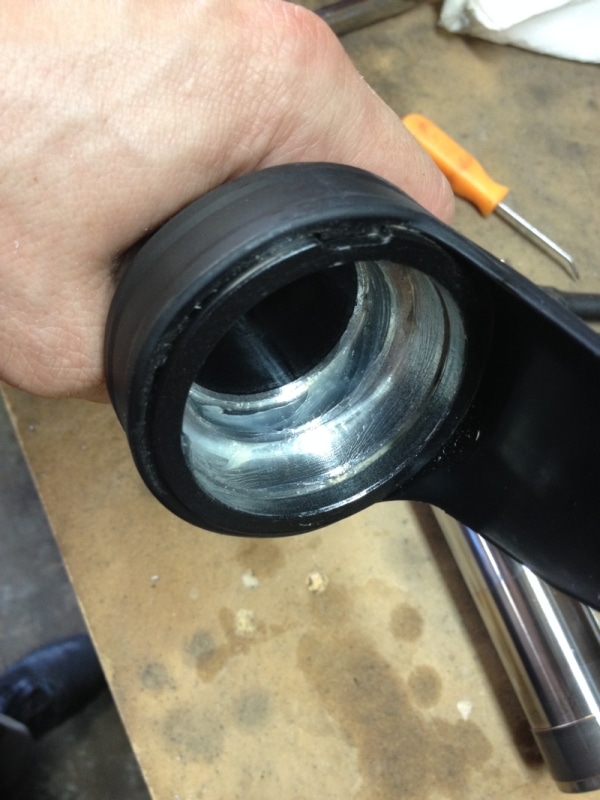
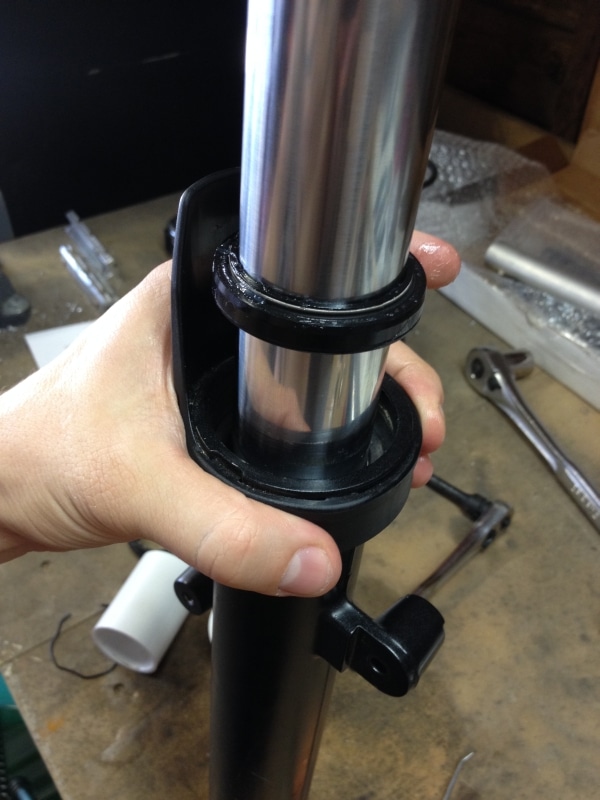
Grease the inside lip of the lower fork leg with heavy fork seal grease like the KYB or Race Tech mentioned above.  I had some Slick Honey left over from doing my mountain bike fork seals so I used that.

IMG_3996

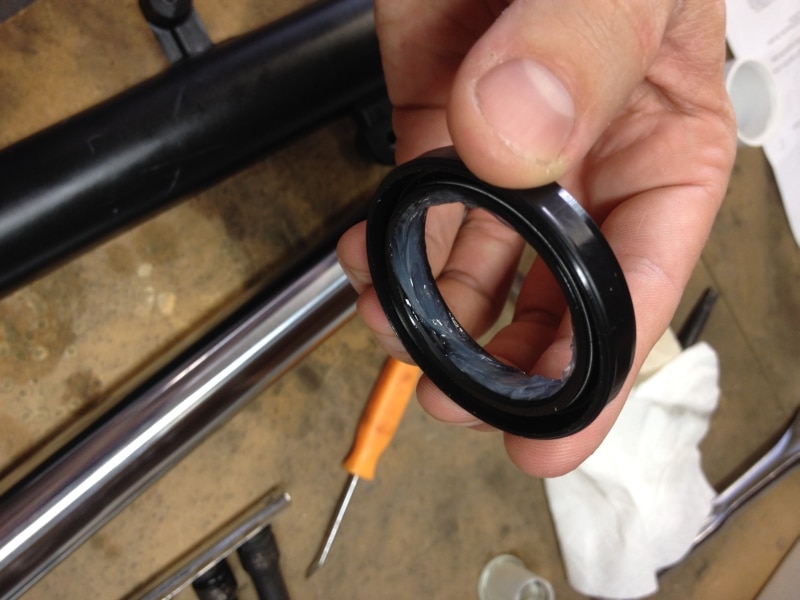
Then also add grease to the inside lip of the fork oil seal:

IMG_4001

Grease the inside of the lower fork leg where the seal and bushings rest, then reassemble the fork tube with the bushings in the same order as you removed it (don’t forget the white plastic bottom out cone), and slide the upper fork tube into the lower fork tube (this is the same photo as above, yours should be cleaned and greased):

IMG_3985

First the white plastic bottom out cone, then the bushings:

IMG_4002

Then the washer:

IMG_4003

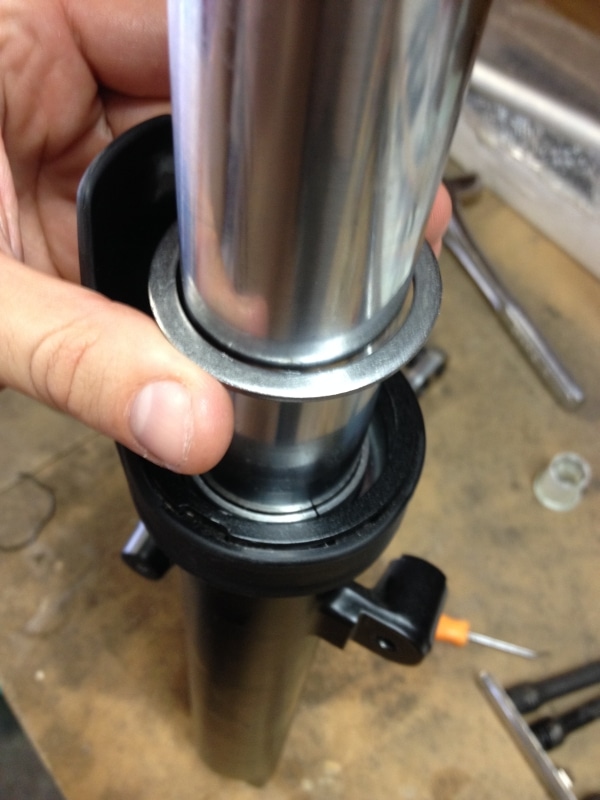
Then the fork oil seal:

IMG_4006

Then the driver with the chamfered side down against the oil seal and the slide hammer on top:

IMG_4007

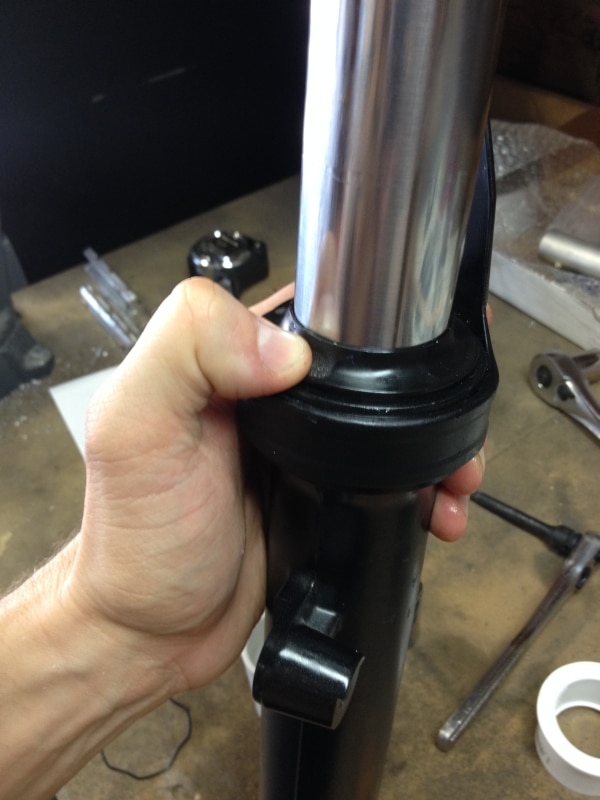
Use the slide hammer to drive the fork oil seal all the way down until it seats and stops moving.  Next, install the retainer clip on top of the fork oil seal.  Use a small flat blade screwdriver to ensure that it seats all the way and clicks into the groove in the fork tube:

IMG_4011 IMG_4012

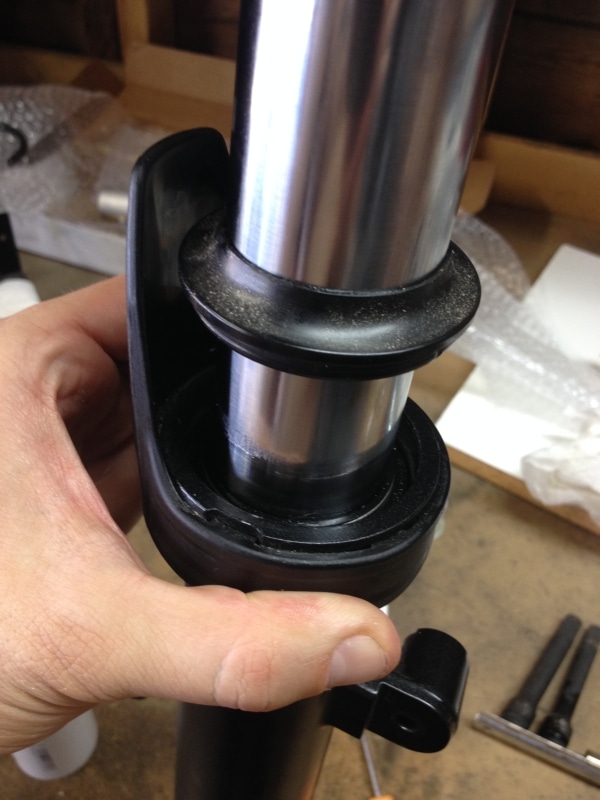
Finally, install the dust seal and press it firmly in place with yours fingers, working your way around until it seats flush with the fork leg:

IMG_4009 IMG_4010

Slide the fork tube in and out to be sure it operates smoothly.


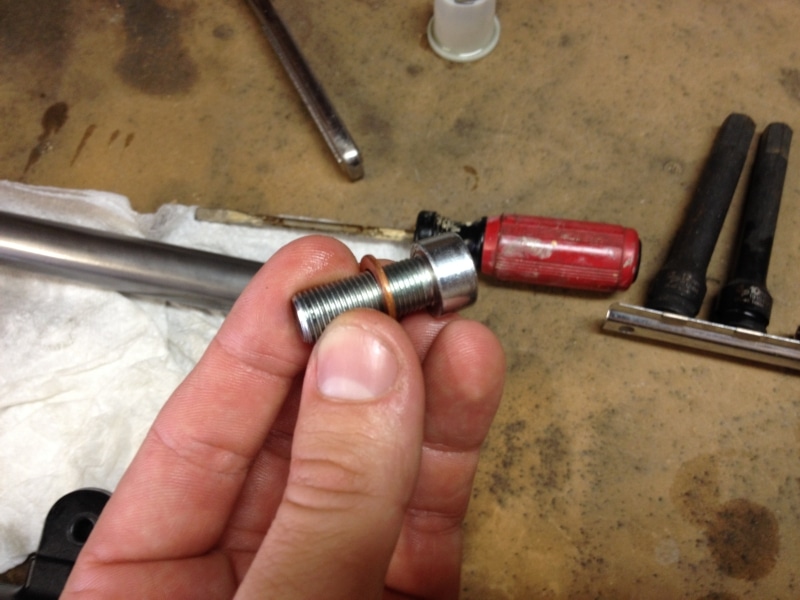
Step 13:  Reinsert the damper rode with top out spring, slide the threaded end into the fork tube first.  Reuse the bottom bolt and crush washer, but clean any locktite off the bolt and washer before reinstalling.  Tip the fork leg right side up and start the bolt into the bottom of the fork by hand using the extended  8mm allen socket.  Once the bolt is finger tight, clamp the fork leg back in the vise by the flat at the end and tighten the bolt.  Tighten this bolt by hand with a ratchet until it does not want to spin.  If the bolt just spins and won’t tighten by hand, you may have to use an electric or pneumatic impact gun to tighten it completely.  Only bump it once with the impact gun, then recheck with a ratchet by hand to see if it is tight and won’t spin.  It is rare that you will have to use an impact gun to get this bolt to tighten completely, but I needed one.  Just be very careful not to strip this bolt, it has fine pitch threads and the fork leg is aluminum so it can be damaged easily.

IMG_4015 IMG_4022 IMG_4024 IMG_4025


Step 14:  Compress the fork leg completely, and fill the fork tube until it is about 3″ from the top with oil, then pump the fork leg up and down to bleed out all of the air.  The OEM oil is 10 weight and it requires 487 ml per fork leg.

IMG_4030


Set the fork leg on a bench or the floor, compress the leg all the way, and set the oil height level to 121 mm while the fork is compressed:

IMG_4033


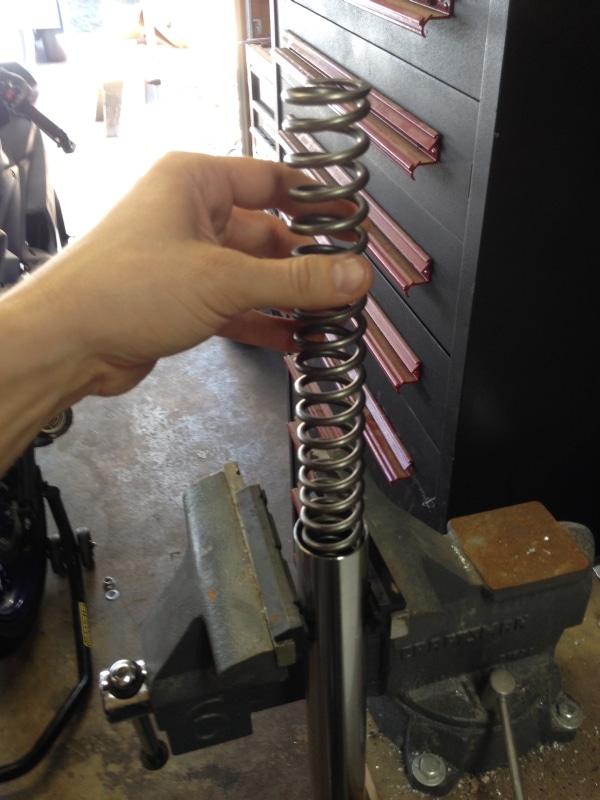
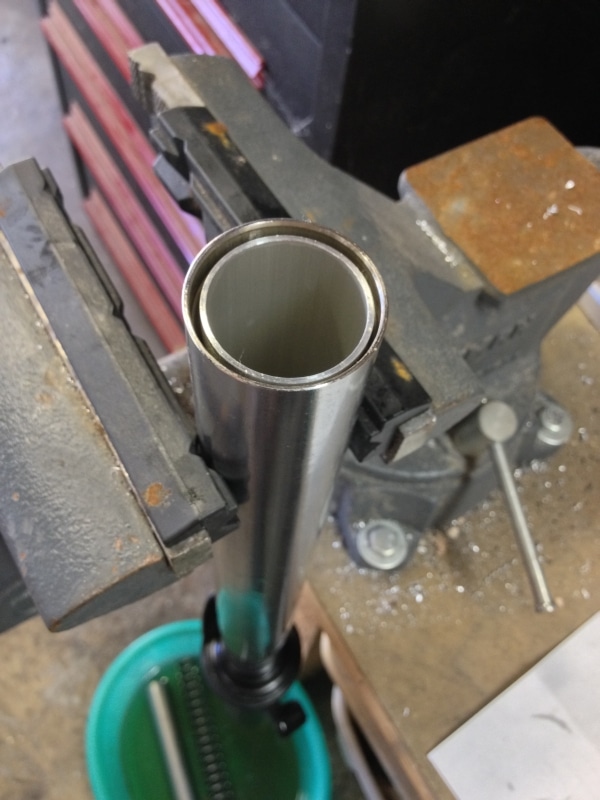
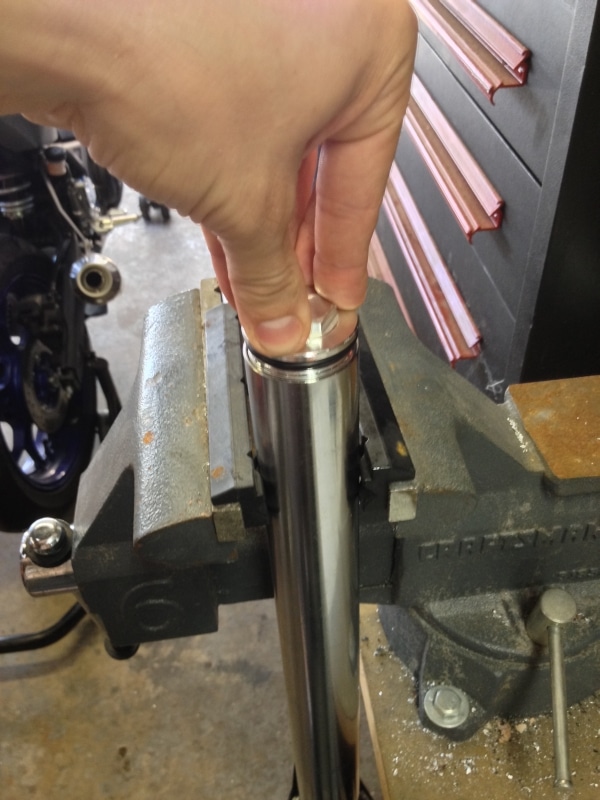
Step 15:  Extend the fork all the way and clamp it back in the vise.  Drop in the spring, then washer, then preload spacer (this picture is of an aluminum aftermarket preload spacer, but same idea).

IMG_4034 IMG_4036 IMG_4037 IMG_4039

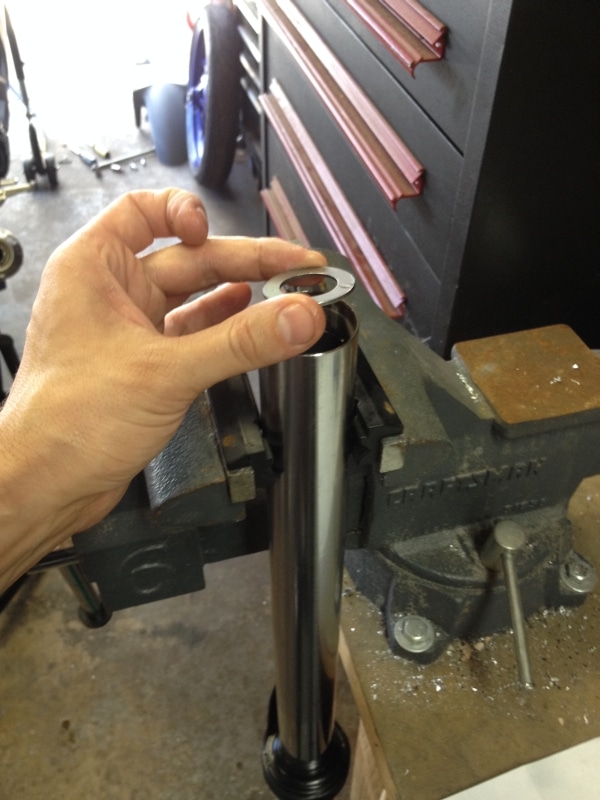
The preload spacer should sit just below the top of the fork tube:

IMG_4041


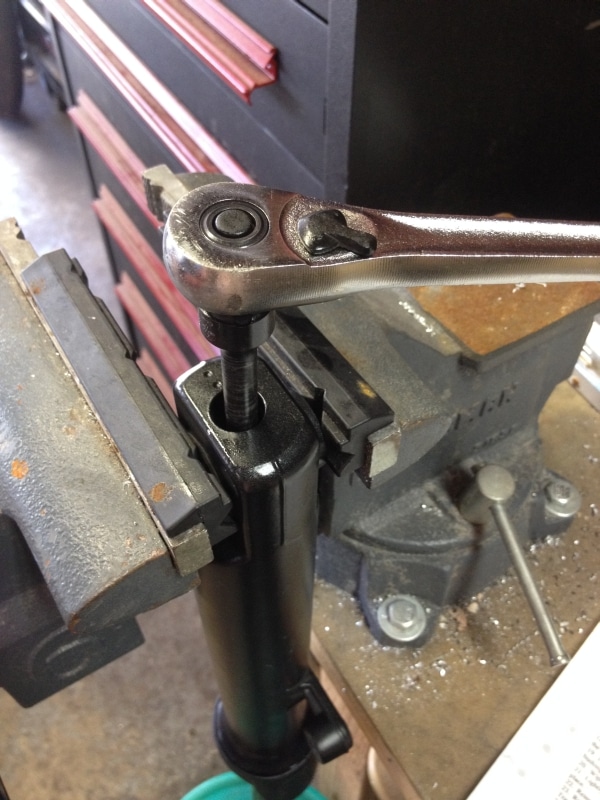
Step 16:  Once everything is installed properly in the fork leg, press the fork cap down while you screw it in by hand or with a socket until the threads catch.  You only have to compress the spring slightly to install the cap.  Torque the cap to 6 ft-lbs.

IMG_4042 IMG_4043

Repeat this process with the other fork leg.

Wipe both forks clean with a cleaner or solvent like alcohol or acetone to remove all oil from the outside before reinstalling the fork legs back on the bike.

Reinstall the fork legs in the reverse of the process above, and you’re all done!

  • Tweet

About Norton Racing

What you can read next

How to remove the tail and taillight of the Yamaha R3
How to remove the fuel tank from the yamaha R3
How to remove the gas tank from the Yamaha R3
how to remove the windscreen yamaha r3
How to remove the windscreen and upper fairing from the Yamaha R3

You must be logged in to post a comment.

Search All Posts

Post Category:

Yamaha R3 / MT-03
  • ** Yamaha R3 / MT-03 Critical Issues
  • *** Top 5 Yamaha R3 / MT-03 Mods and Upgrades
  • Annitori Quickshifter QS Pro installed and beta tested on Yamaha R3
  • Dyno tested: 520 vs. 415 chain and sprockets – Yamaha R3
  • How to bleed the brakes or flush the brake fluid on the Yamaha R3 / MT-03
  • How to change the front brake pads on the Yamaha R3 / MT-03
  • How to change the Yamaha R3 / MT-03 to GP Shift
  • How to do an oil and filter change on the Yamaha R3 / MT-03
  • How to get more dash clearance for your clipons and brake line – Yamaha R3
  • How to install a BMC Race Air Filter in the Yamaha R3 / MT-03
  • How to install a stainless steel braided front brake line on the Yamaha R3 / MT-03
  • How to install a Yoyodyne slipper clutch in the Yamaha R3 / MT-03
  • How to install aftermarket clipons on the Yamaha R3 / MT-03
  • How to Install Hotbodies Race Bodywork on the Yamaha R3
  • How to install the Traxxion Dynamics Fork Damper Rod kit with Cartridge Emulators in the Yamaha R3 2015-2018
  • How to remove the emissions systems and install a block off plate on the Yamaha R3 / MT-03
  • How to remove the front wheel from the Yamaha R3 / MT-03
  • How to remove the gas tank from the Yamaha R3
  • How to remove the kickstand from the Yamaha R3
  • How to remove the rear wheel from the Yamaha R3 / MT-03
  • How to remove the side fairings from the Yamaha R3
  • How to remove the tail and taillight of the Yamaha R3
  • How to remove the windscreen and upper fairing from the Yamaha R3
  • How to replace the fork seals on the Yamaha R3
  • Installed: Hotbodies Color Form Race Bodywork – Yamaha R3 2015-2018
  • Lightweight Rear Brake Rotor for Yamaha R3
  • Paint is done, heading to 5zero4 Designs next weekend to install the graphics
  • Suspension Spring Rate Chart for Yamaha R3 / MT-03
  • What are the best clipons for the Yamaha R3?
  • What are the best rearsets for the Yamaha R3?
  • Yamaha R3 / MT03 Exhaust Dyno Test and Superbike Build
  • Yamaha R3 OEM exhaust weight, headers, muffler, slip-on, heat shield

Contact Information

Email: sales@norton-motorsports.com
Telephone: (858) 842-4595

Address

Norton Motorsports
San Diego, CA

Contact us for address before sending anything.

Thank you.

© Copyright Norton Motorsports. All rights reserved.

TOP