What are the best clipons for the Yamaha R3?
With lots of options on the market now for clipons for the Yamaha R3, I hope this post will help you choose the best set for your Yamaha R3 the first time. After extensive testing of several different clipon sets and styles available for the Yamaha R3, I have decided on my recommendations. I personally installed and tested 3 different sets, which represent 3 completely different styles, on my own bike, and road it on track during testing and racing. Here are my conclustions, scroll down for detailed info and pictures of all tests.
The first set I tested was the Vortex 41mm 7 degree drop clipons. This set doesn’t have any rise, and must be mounted above the triple clamp or it has too much interference. The clamp is 28mm tall and the stock bike has about 25mm of fork tube above the triple clamps, so you have to slide the fork tubes up through the triple clamps about 3mm to fit the Vortex clipons on top of the triple clamp. This lowers the front of the bike 3mm. My geometry tests have shown that the bike performs well on track with the back slightly higher than the front, so dropping the front slightly has proven to be a good thing when using the stock shock. This goes out the window when you replace the rear shock with an aftermarket one because I recommend extending the length of the shock drastically to improve handling and ground clearance. Using a longer aftermarket shock substantially raises the back end of the bike and requires a height increase (though not quite as much) to the front of the bike as well, which requires that the clipons be mounted below the triple clamp so you can slide the fork tubes down farther into the triple clamp. Therefore, I do not recommend the Vortex clipons for racing. I do, however, think that the Vortex clipons are the best set for replacing the stock bars on a bike that is mainly or solely for street riding and will retain the stock shock, or stock length shock. Because the Vortex clipons mount above the triple clamp, they really tidy up the front of the bike, cover the tops of the forks, and look excellent, while providing a much better riding position than stock, and have just enough clearance that interference is not an issue when they are positioned correctly.
There are other sets similar to the Vortex no rise set, such as the Woodcraft Universal no rise set, the Driven Halo and Race series sets, and some inexpensive chinese sets on eBay. All of these no rise sets will require mounting above the triple clamp, and thus, the above review applies to most of these. The Vortex set is unique in that it has the shortest clamp of all of these sets, and thus requires the smallest change in fork height to fit properly above the triple clamp. The Woodcraft set and some of the other sets, would require you to lower the front of the bike about 1/2″, which I don’t recommend doing.
The second set I tested was the Woodcraft R3 Clipons. Woodcraft made this set specifically for the Yamaha R3 to lower the bars without any interference. This set mounts under the triple clamp and doesn’t require any modification to the bike to fit. They accomplished their goal, and this set will allow you to lower the bars as much as any, with the least interference, however, I don’t recommend this set for racing because the bars are too close to the rider, and too wide and flat. I don’t recommend this set for street use because I think they look ugly on the bike with the large amount of fork tube sticking up above the triple clamp. Read more below…
The third set I tested was the Woodcraft Universal 41mm Clipons with 1.5″ rise. This set is best mounted under the triple clamp, although, if you are looking to replace the stock set with a comparable set with similar position to stock, mounting this set above the triple clamp provides a close match to the stock position. This set is the best for racing, hands down. Mounting these under the triple clamp allows you to raise the front of the bike as necessary for proper geometry, and allows you to lower the clipons as far as you like. Once a few mods are done, described below, there is no issue with interference, and this set provides a very low clipon position, but also, the farthest forward clipon position, and the narrowest bar position, with a good 5 degree down angle. This is the set I will be using on my bike, combined with the Graves steering stop.
There are other sets of clipons available on the market, but most of them are similar in some way to one of these sets and sort of fall into one of these categories being reviewed.
The last option, which is actually a pretty decent way to start, if you are on a tight budget, is to remove the stock clipons from above the top triple clamp, and remount it just below the top triple clamp. This gives you a pretty low bar position, that isn’t quite as far forward as the Woodcraft 1.5″ rise set, but still much better than stock, and costs nothing. You will need to install a steering stop like the Graves in order to eliminate interference issues.
All of the aftermarket clipons will save you substantial weight off the bike because of the stronger, lighter weight materials, and the fact that the OEM bars are actually weighted internally to dampen vibration. The stock bars weigh 3 lbs 9 oz with the bar ends (3 lbs 5 oz without the bar ends as seen in the photo below) and the Vortex clipons weigh just under 1 lb 4 oz. So you drop over 2 lbs from the highest point on the bike by changing the clipons, sweet deal! The Woodcraft sets are both about 1 lb 6 oz.

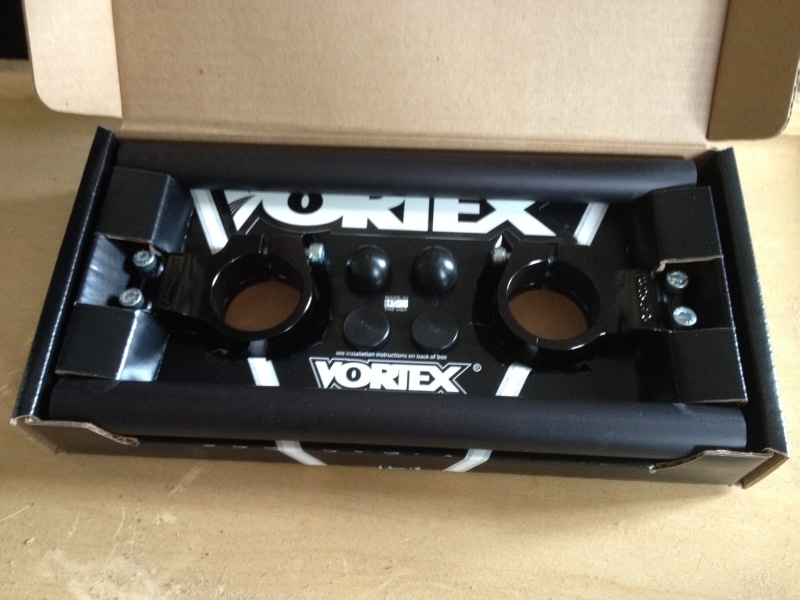
Vortex 41mm 7 degree drop clipons
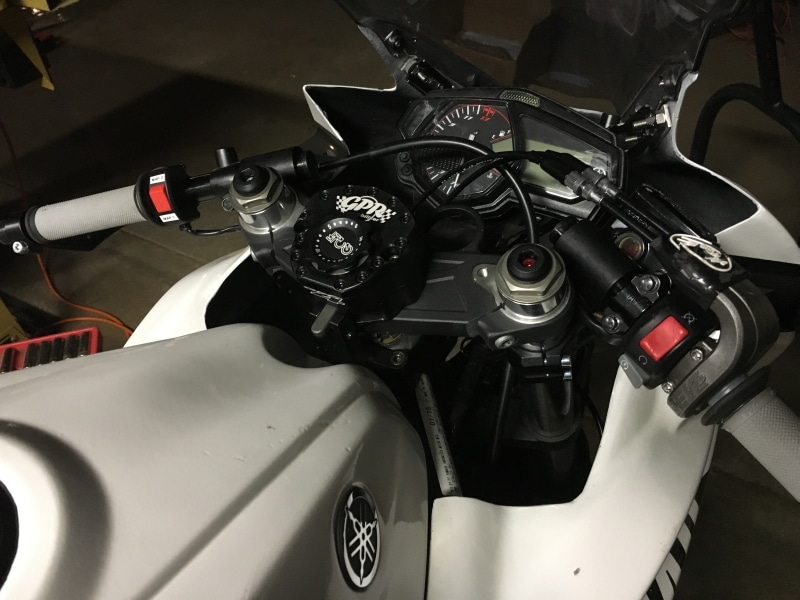
The Vortex clipons have a narrower clamp than the Woodcraft, so they fit pretty well on top of the triple clamp with just a tiny lip hanging over. I still wanted to have them fully clamped, so I lowered the front of the bike (slid the fork tubes up through the triple clamp) about 3mm so the clamps are flush with the top of the forks. I cover how to do this in my clipon install post here. They also have a 7 degree drop angle which gets them a little lower than if they were flat and provides a better angle to reach the throttle while leaned off the left side of the bike. You can see from the photos below, they are significantly lower than stock. The photo shows the end of the bar about 2.5″ lower than stock, but because of the 7 degree drop angle, the part where you grip the throttle is probably somewhere around 1.5″-2″ lower.
At first, I thought there was still a little room under the bars to get a lower set before they interfered with the bodywork, but now that I have them fully installed, these are about as close as you can get. Once everything is adjusted, at full lock to the left, the brake line just barely clears the gauge cluster, and at full lock to the right, the brake line and throttle cables barely clear the bodywork near the tank. It’s literally a perfect fit, couldn’t get any closer! There is also just barely clearance between your fingers and the upper fairing and full lock left and right once adjusted in the right spot Phew!

With the forks at the stock position in the triple clamp, the Vortex clipons barely stick above the top. They clamp ok, but not ideal. This picture on the left is with the forks in the stock position, the picture on the right is after I raised the forks up 3mm so the Clipons are flush:


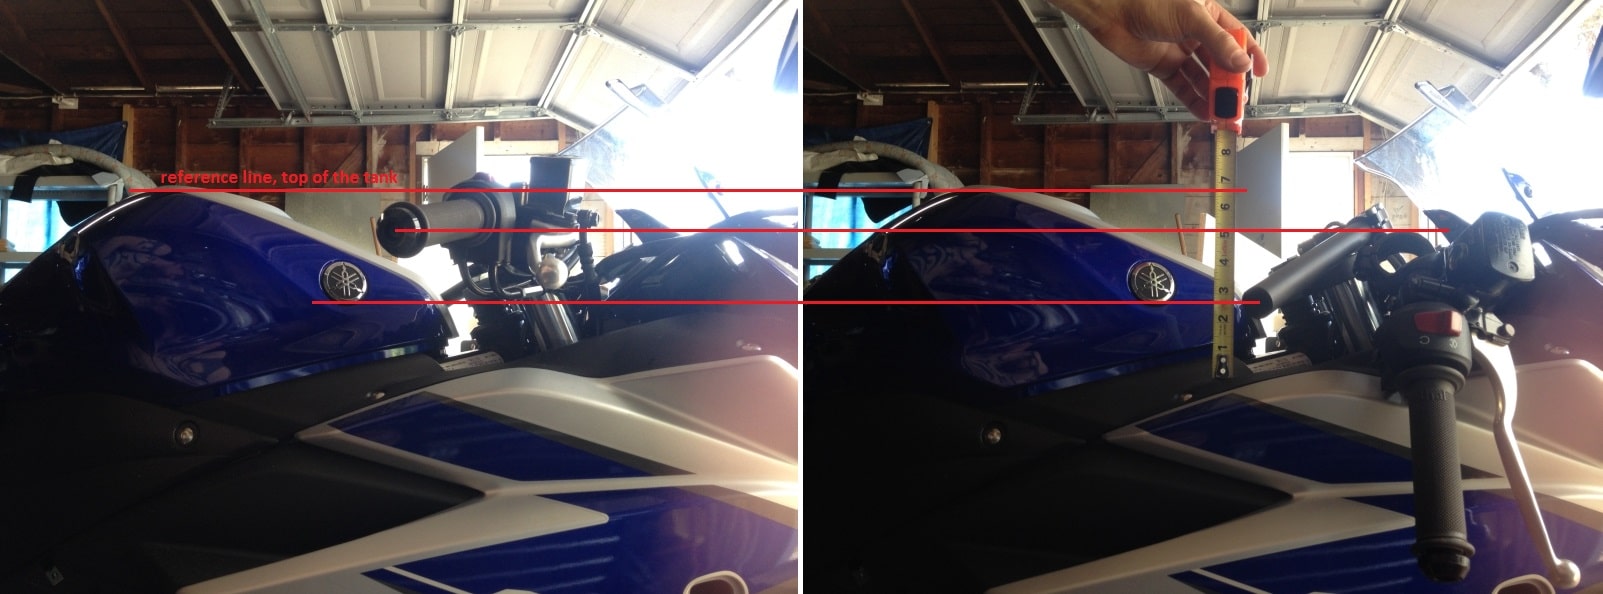
This shot is to show the relative bar height compared to stock. The stock bars are on the left, the Vortex clipons are on the right. You can see the Vortex clipons with the 7 degree drop lower the bars about 1.5-2″ at the grip.
Woodcraft Universal 41mm No Rise Clipons

Woodcraft R3 Specific Clipons
The R3 specific clipons from Woodcraft are supposed to be the lowest available without interference, since they are made specifically for the R3. However, because of flatter angle (5 degree down instead of 7) and how they mount to the outside of the fork tube instead of in front of it (the clamp is below the triple clamp), they put the bars in almost exactly the same place as the Vortex for me, but the angle of the bar is flatter. I do like my brake lever pointed down pretty far, and so if you prefer your brake lever flatter, you will be able to lower this set farther than the Vortex set. I rode these for 1 day and took them off. Because they mount to the side of the fork tube, they don’t have any interference issues with the dash or front fairing, but the bars are a few inches closer to the rider. If you try to rotate them forward to get the bars farther away, they position the bars very flat and stick out pretty far from the side of the bike. The flatter angle makes it easier to twist the throttle to full throttle while upright, but is less comfortable overall. If you angle them back toward the rider slightly for a more comfortable grip angle, then they are too close to the rider. The bars are also too long and stick out very wide. They need to be cut almost an inch shorter to put the grips where they should be. I talked to Woodcraft about this and I think they are going to make some special shorter bars for future orders.


Woodcraft Universal 41mm 1.5″ rise clipons
(these are different than the set listed above)

The Universal 41mm clipons with 1.5″ rise by Woodcraft is what I am currently using and recommending for racing the Yamaha R3. This set mounts below the triple clamp, but has a large 1.5″ rise so that the bars can be positioned even with the triple clamp, or lowered as far as the rider desires. These clipons also mount in front of the forks which puts the bars several inches farther forward than the R3 specific clipons mentioned above. This is also very advantageous for racing, especially on a small bike like this, where the rider can easily feel cramped. The design of the clamp where the bar mounts to the fork is also a little slimmer than the Vortex, and you can slide the brake master cylinder closer to the fork tube without interference. This allows you to make the entire bar assembly narrower. Again, this is very nice for racing, especially when you have to add a brake lever guard to the end of the bar. My tests have shown that the R3 performs best with the front of the bike raised up, and the back of the bike raised even more. This requires you to slide the forks down into the triple clamp, so clipons must be mounted below the triple clamp. When initially installed, the Woodcraft Universal 41mm 1.5″ rise set appears to have too much interference at full lock in both directions, but the installation of a steering stop to limit the steering rotation solves this and is a worthwhile modification for a race bike. I now carry the Graves steering stop, which is a genius little product. It’s a very simple, effective, and inexpensive steering stop that bolts on in 2 seconds and does just the trick. This is what I’m currently using on my bike:


A home made steering stop can be installed by drilling and tapping the steering stop on the triple clamp and installing a screw or bolt as seen in this picture (it can also be installed from the opposite side):

At some point when you get this set of clipons very low, you will have some interference between the front brake master cylinder banjo bolt and the dash at full lock to the left because this set is farther forward than any other set. This can be completely solved by moving the dash forward, as described in my post here about how to get more dash clearance for lower clipons. With the Graves steering stop in place and the dash moved forward, these Woodcraft Universal 41mm 1.5″ rise clipons can be lowered farther than the Vortex set, or the Woodcraft R3 specific set, without any interference. With the steering stop installed, and the dash moved as far forward as possible before it contacts the fairing stay, you are free to lower the clipons as much as you like until your levers hit the bodywork. In my case, I have them at about the same height as the Vortex and Woodcraft R3 sets because I like my brake lever pointed down pretty far and it will hit the fairing.


7 Comments to “ What are the best clipons for the Yamaha R3?”
You must be logged in to post a comment.
Nice write-up and pix, Jess. Your pic of the front m/c banjo angle is very dark. You may want to add an arrow or get a brighter pic. Otherwise, superb work, as usual.
Hey Jess I’m not racing the R3 although it would be a kick ass toy on track for sure, my question is what do you reccomend for the street, clip on wise? I wanted something more aggressive for when I want to have s little fun through the twisties ? i think you said vortex were the go, yeah? Thanks man!
For street use, the Vortex are the best solution in my opinion, but they do require that you slide the fork tubes up through the triple clamp about 3mm as I explain in my How to post on installing clipons. Please review this post before purchasing. Also, I now offer the replacement left side OEM grip and right side R6 throttle tube to go with the clipons.
I must say that this might be the most helpful and well written tutorial or “how to” write-up I’ve ever seen. I’m currently installing the R3-specific Graves clip-ons and I too have run into an issue with clamp size relative to the fork above the triple. Graves advertises these bars as being designed for above or below the triple clamp but that’s not the case. And because I fabricated a new seat that provides four more inches of seated seat height, I’m afraid the bars will be too low if installed under the triple. I look forward to doing business on your site. I’m glad I found it.
Thanks for this write up, very informative. Can these bars be used with the factory throttle cable location, or do you recommend say a motion pro setup for clearance reasons?
Thanks
Installing clipons can be a little complex to get all of the clearances you want and the bar position you want. If you are trying to lower the clipons, it helps a lot to rototate the throttle housing on the bar so that the cables point forward instead of down.
Very nice comparison and recommendations. Thank you very much.