How to remove the tail and taillight of the Yamaha R3
Wondering how to remove the tail on the Yamaha R3? Going to install an integrated tail light or fender eliminator? Here’s a simple step by step guide to remove the entire tail section from the Yamaha YZF-R3. Use what you need, and reverse to put it back together. If you just want to remove the rear fender and turn signals, follow steps 1-9. Continue on with steps 10-14 to remove the tail light and side panels. Enjoy!
Tools Needed:
the key for your R3
4mm allen wrench
8mm socket
small pick or flat blade screwdriver
phillips screwdriver
10mm socket
a zip tie if you cut the factory one to remove the tail light
Step 1: Put the key in the left side of the tail section and release the passenger Seat.
*hopefully no picture is necessary, ’cause I didn’t take one =)
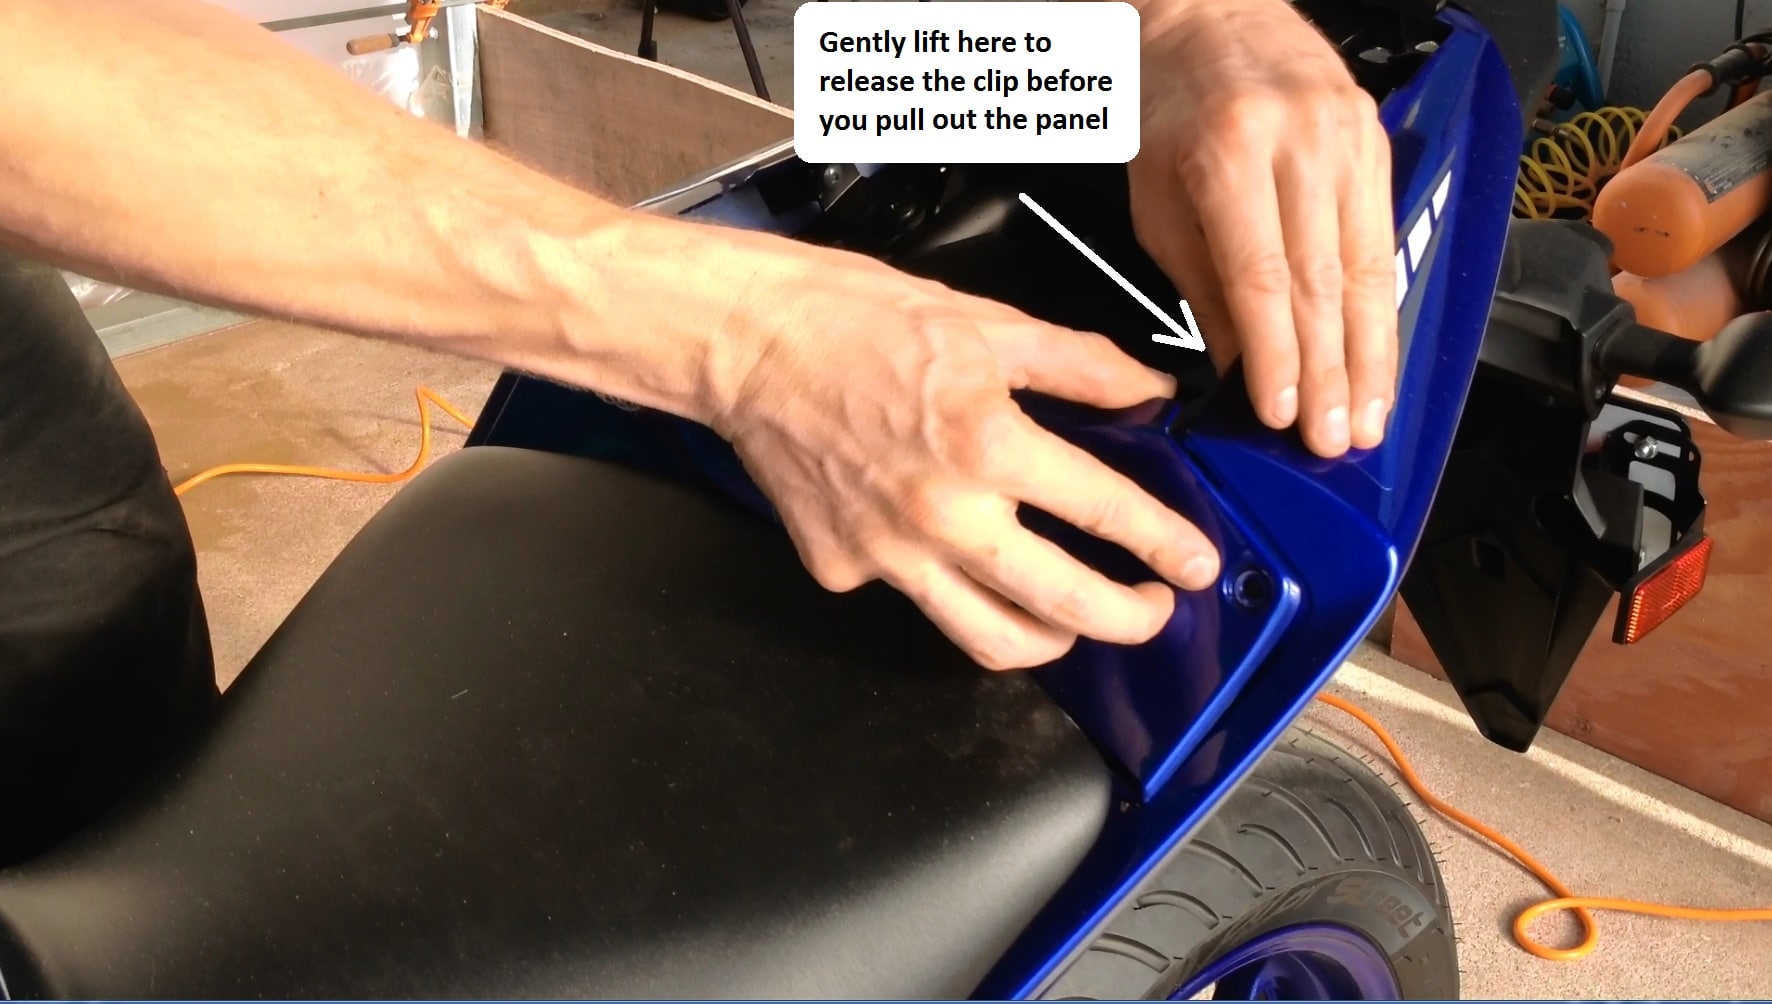
Step 2: Use a 4mm or 5/32″ allen wrench to remove the two screws that hold on the plastic piece that covers the seat bolts. Once you remove the screws, gently lift up on each corner of the tail section to release the clips before you pull the panel out.

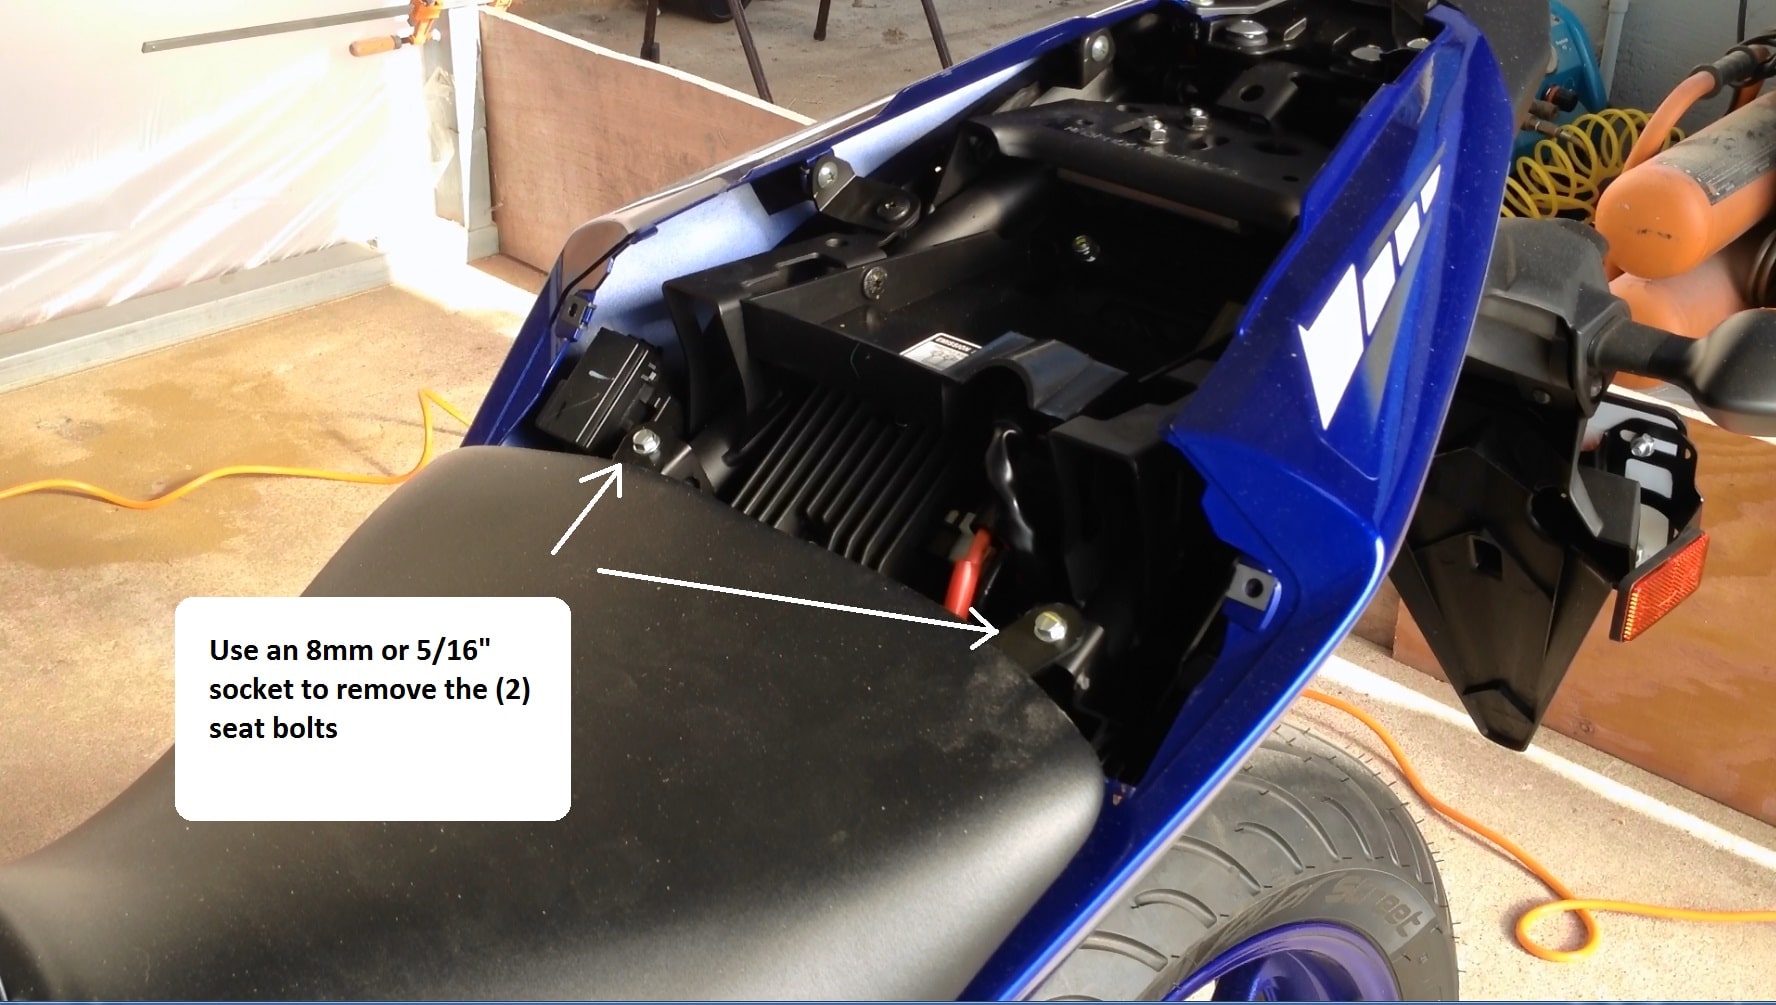
Step 3: Use an 8mm or 5/16″ socket to remove the two seat bolts.
***With the seat removed, you can easily access the fuse box on the right side of the bike***
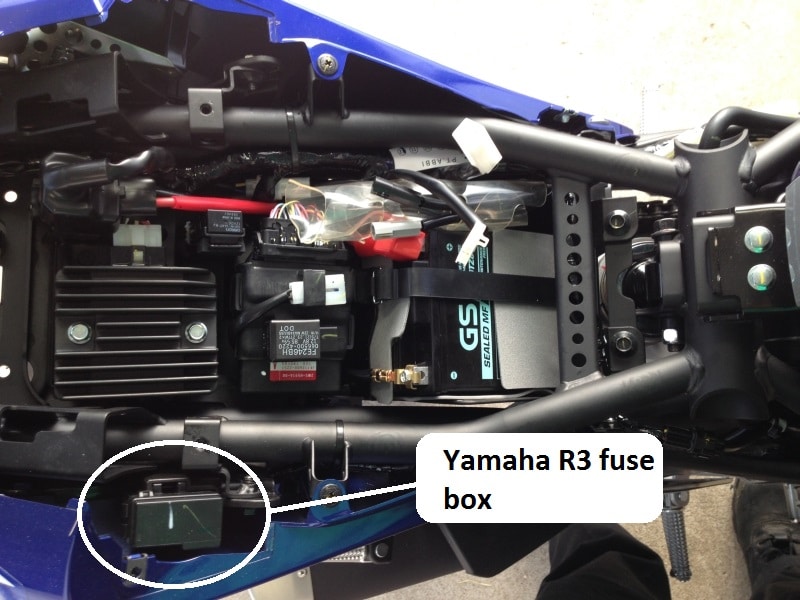
Yamaha R3 Fuse Box Location
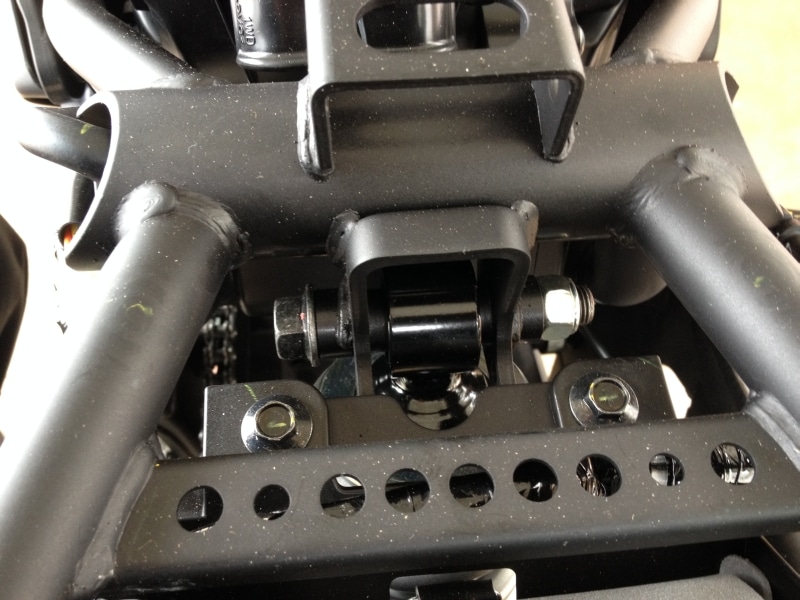
***You can also see the rear shock upper mount***
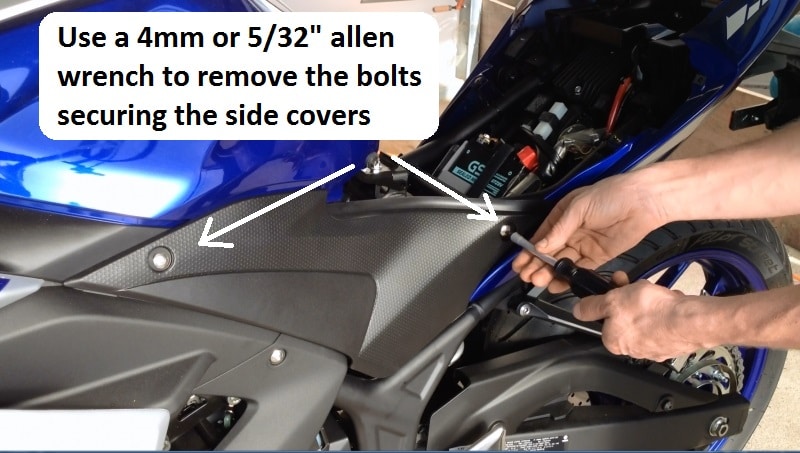
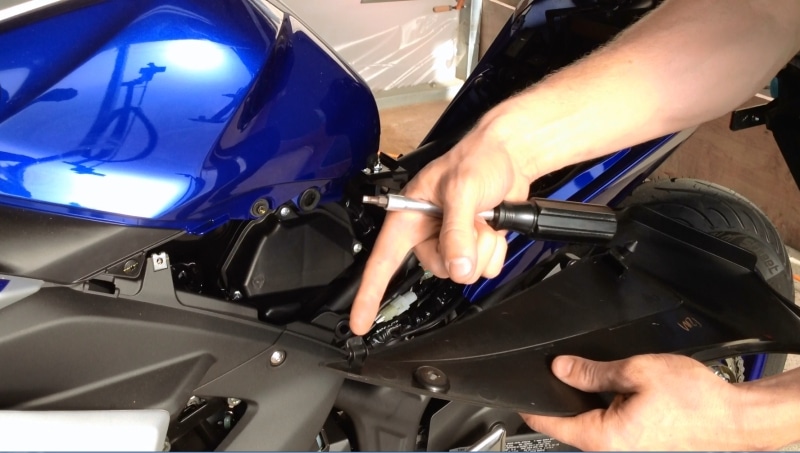
Step 4: Use a 4mm or 5/32″ allen wrench to remove the side cover panels.
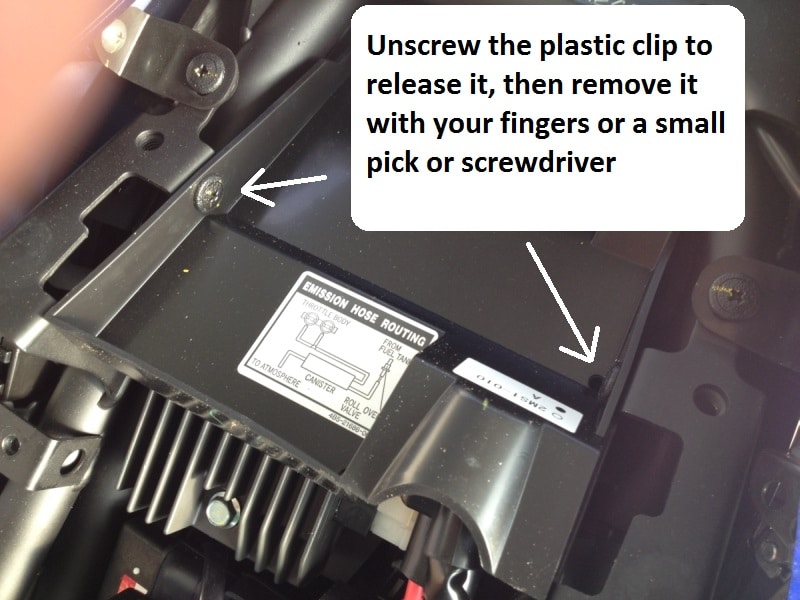
Step 5: Use a phillips screwdriver to release the two plastic clips, then pull them out with your fingers, or pry them out with a small pick or flat blade screwdriver and remove the plastic storage tray.
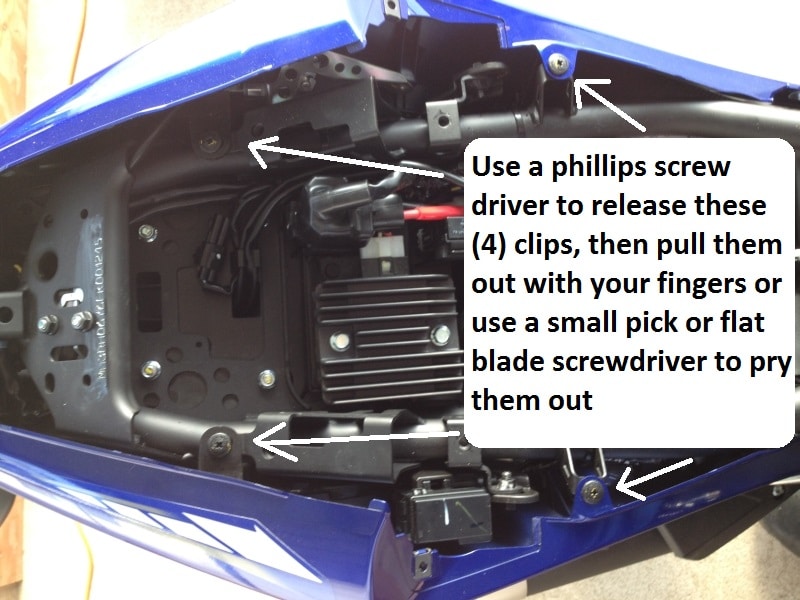
Step 6: Remove the connectors to the turn signal flasher relay and the battery ground connector to give yourself better access to the rest of the connectors, be sure to put these back later! Remove the flasher relay from the rubber hook on the back to unclip the connector with your finger. Slide the battery ground connector out of the rubber sleeve and use a small pick or flat blade screwdriver to open the connector, it’s a little stubborn.


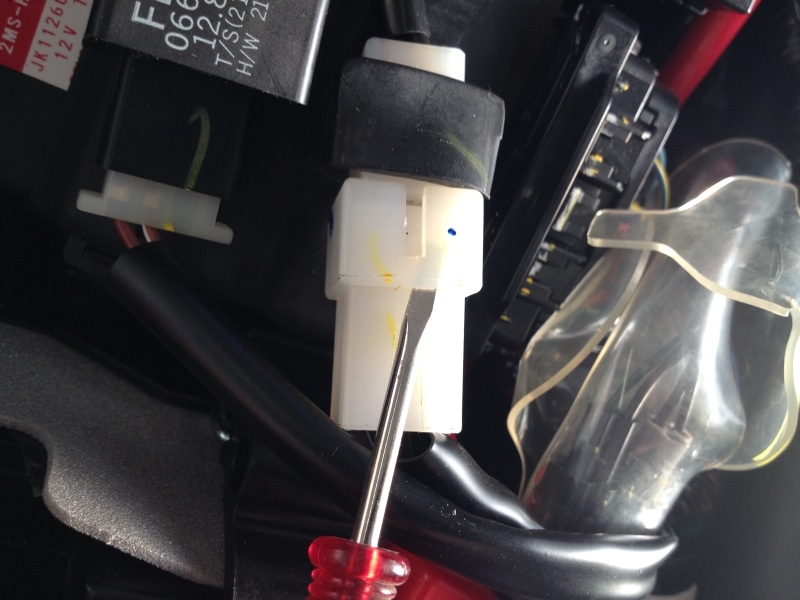
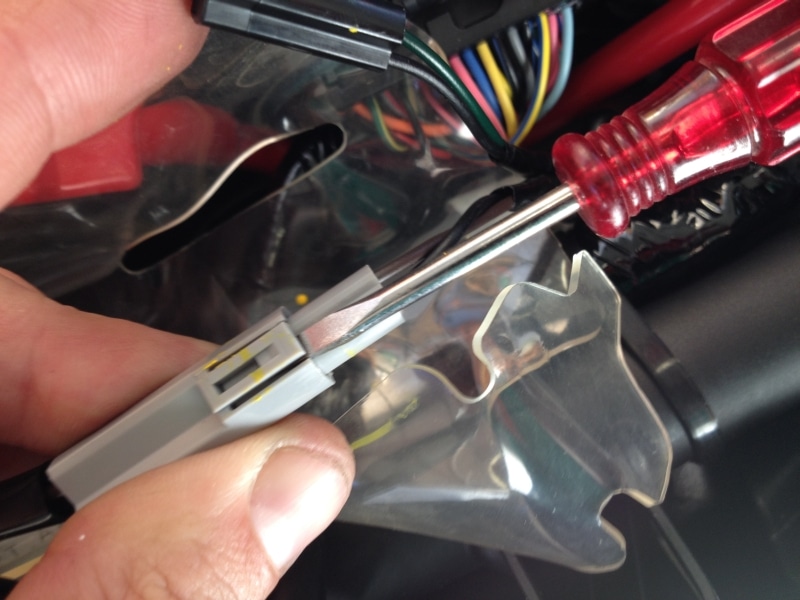
Step 7: Unwrap the rubber protector around the turn signal connectors. Use a small pick or flat blade screwdriver to remove the turn signal connectors.
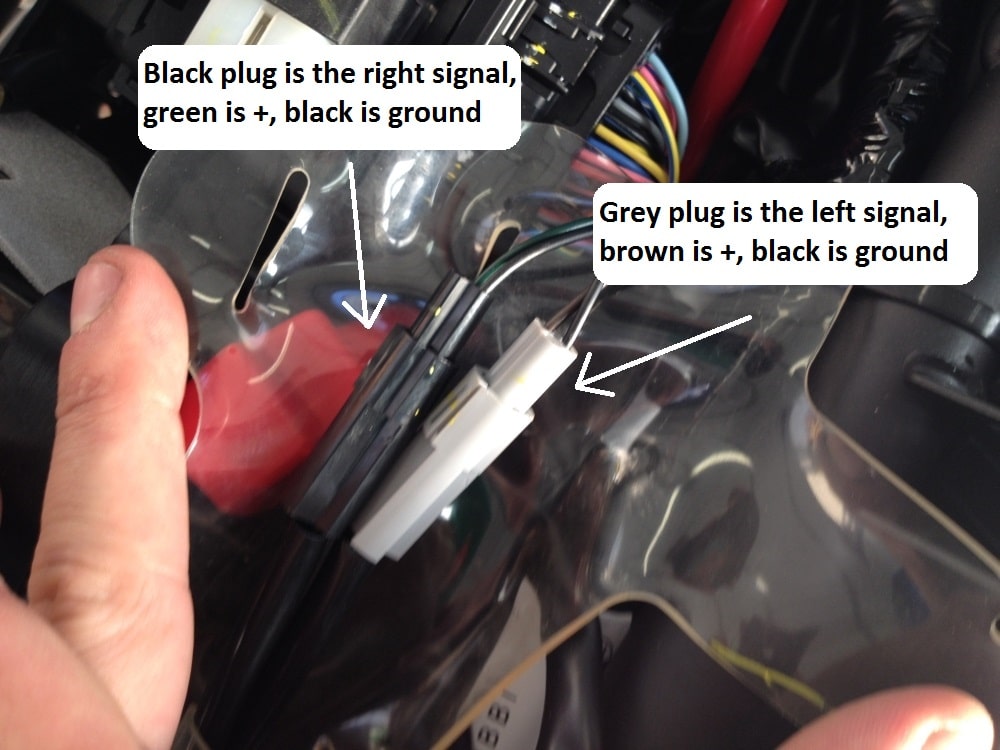
Yamaha R3 Turn Signal Wire Colors
Step 8: Unclip the license plate light connector, it is located below some other wires.

Yamaha R3 Brake Light Wire Colors
Step 9: Once you have the cables disconnected, use a 10mm socket to remove the four nuts that hold on the fender assembly. The assembly comes off all together. You do not need to remove the clips or bolts underneath the fender assembly, the entire assembly comes off together. You do not need to remove the fender in order to remove the tail light.

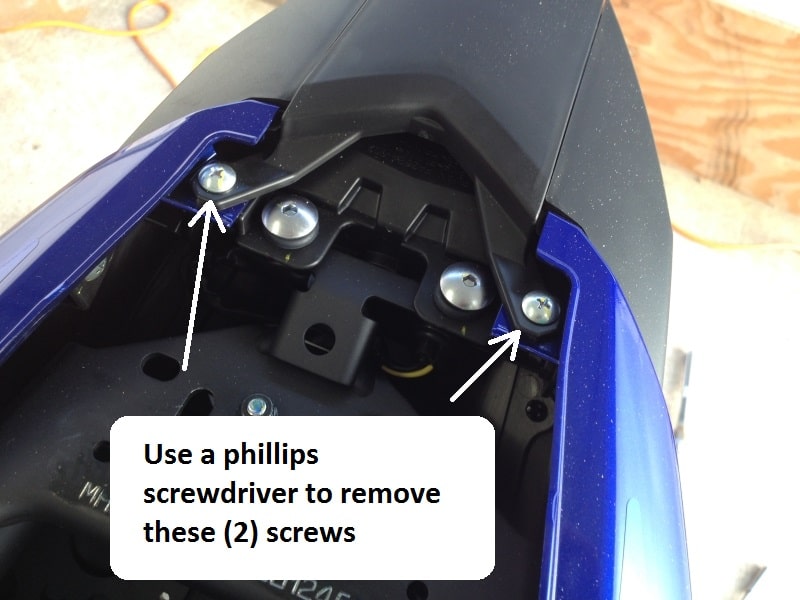
Step 10: Use a phillips screwdriver to remove these 2 screws next to the tail light. Do not remove the tail light bolts in the middle yet, leave them in until later so the tail light doesn’t fall out and get damaged.
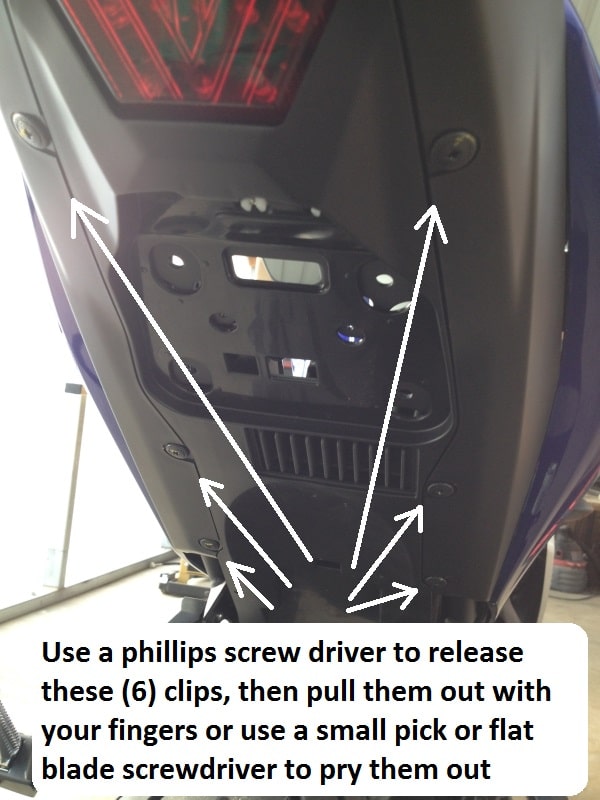
Step 11: Use a phillips screwdriver to release the 4 clips on the top of the tail, and the 6 clips underneath the tail, then pull them out with your fingers, or pry them out with a small pick or flat blade screwdriver.
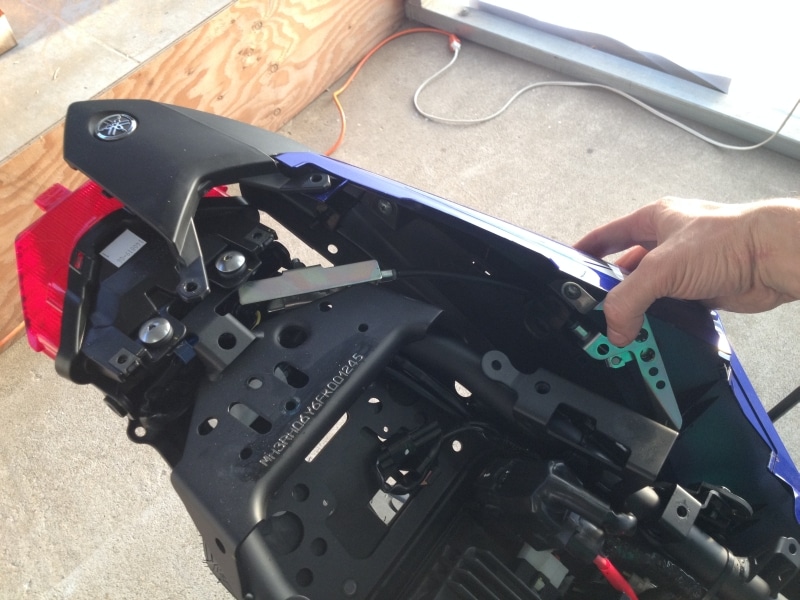
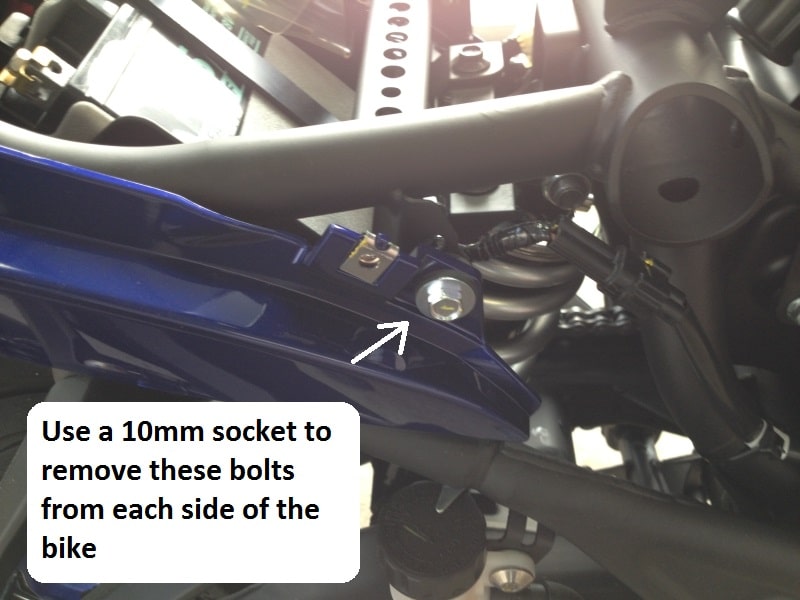
Step 12: Use a 10mm socket to remove the bolt from the right side of the bike first. This is the last bolt holding on the right side tail section. The the left side has the latch for the passenger seat mounted to it and I will cover this in the next step. Once removed, gently pull the bottom of the panel away from the bike to release the plastic pin from the rubber grommet on the bottom of the tail light, then slide the tail section toward the front of the bike to release the clip in the back by the tail light.

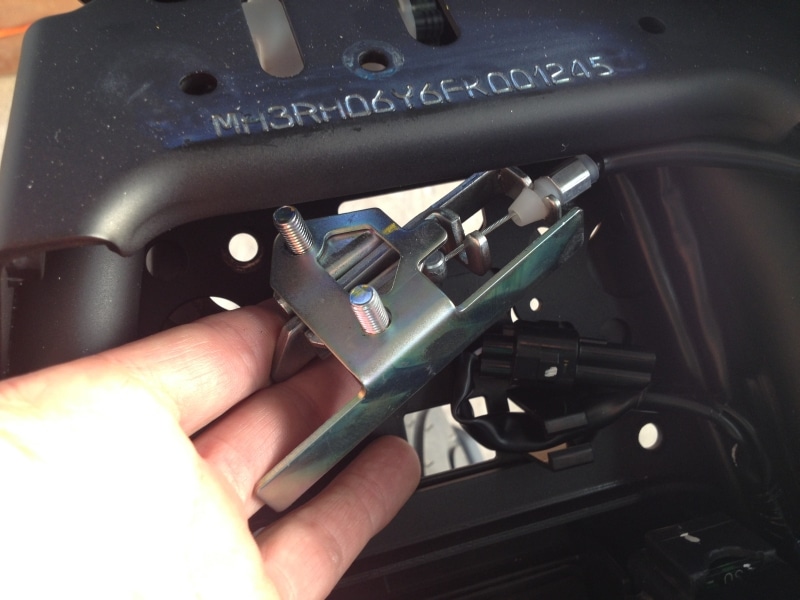
Step 13: Use a 10mm socket to remove the two nuts securing the passenger seat latch assembly. Once the latch assembly is free, remove the 10mm bolt pictured above from the left side of the bike. Gently pull the bottom of the panel away from the bike to remove the plastic pin from the grommet on the tail light, then remove the panel from the bike.

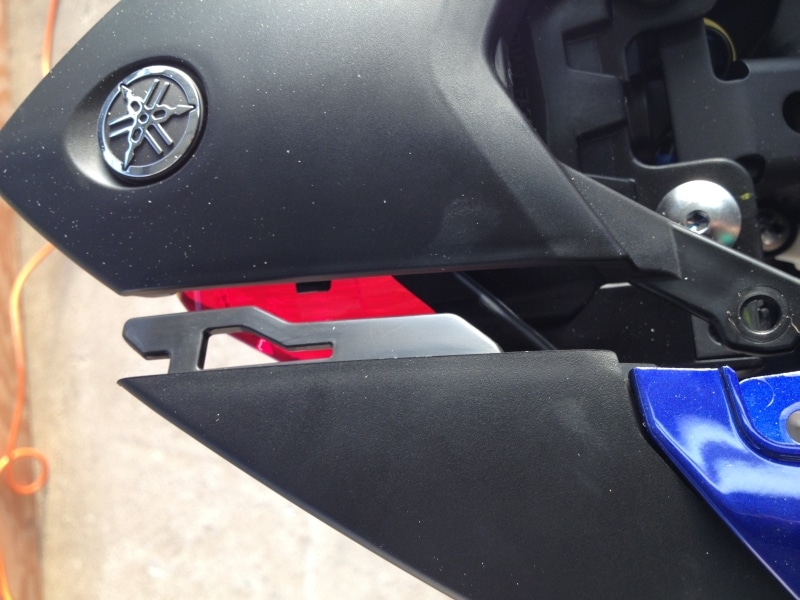
***Once the side panels are removed, you can also access the bank angle sensor behind the tail light.***

Yamaha R3 Bank Angle Sensor
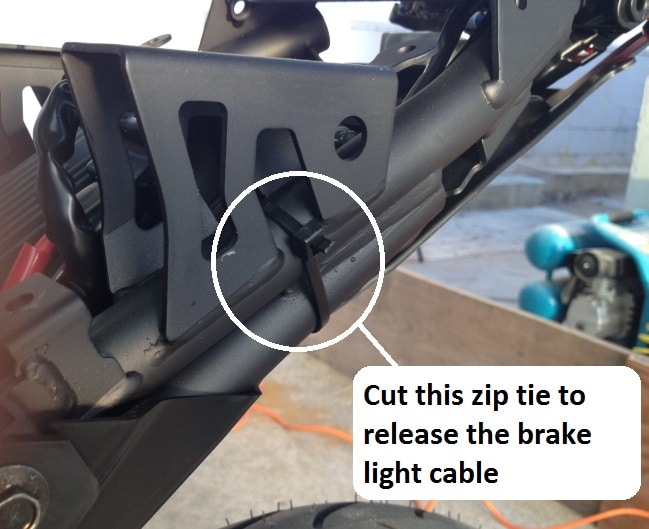
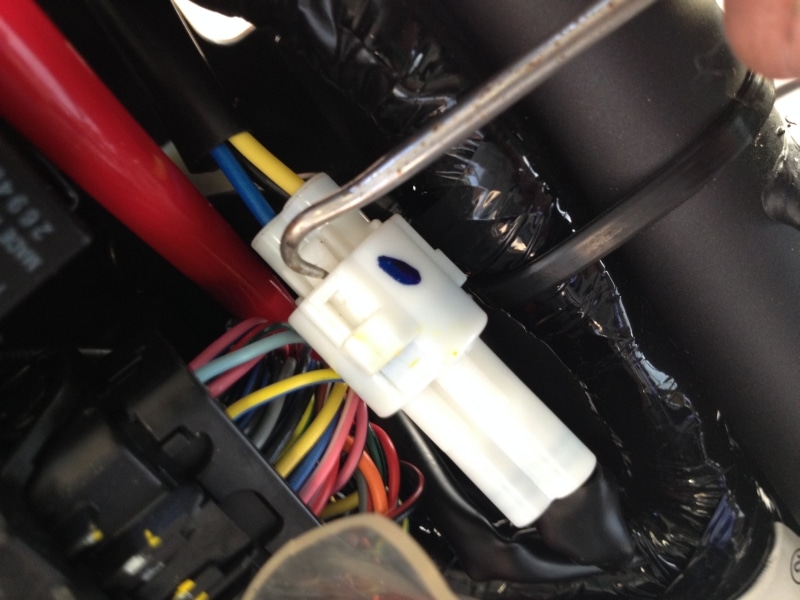
Step 14: Cut the zip tie that secures the tail light cable. Unclip the brake/tail light connector. The brake light connector is a little difficult to open because of the rubber seal inside the connector, use a small pick or flat blade screwdriver to unclip it and pull it apart.
Yamaha R3 Brake Light Wire Colors
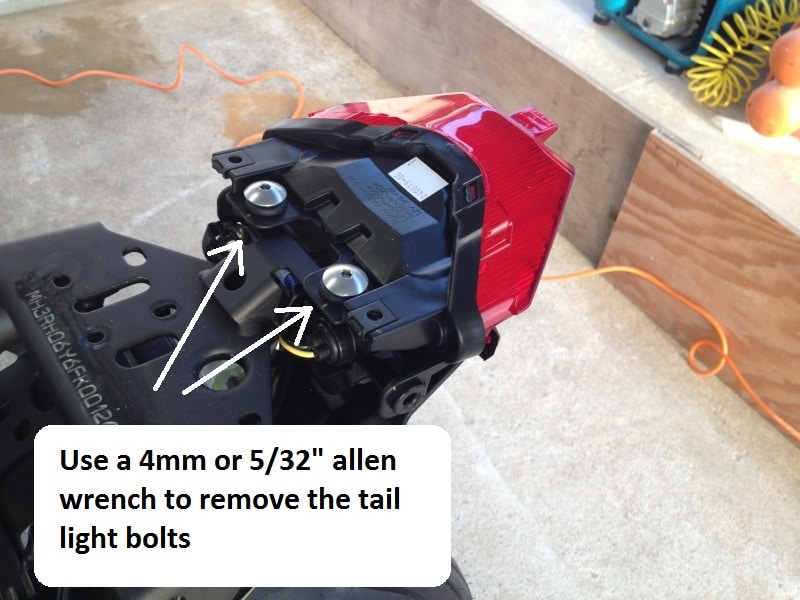
Step 15: Use a 4mm or 5/32″ allen wrench to remove the two bolts that secure the tail light.
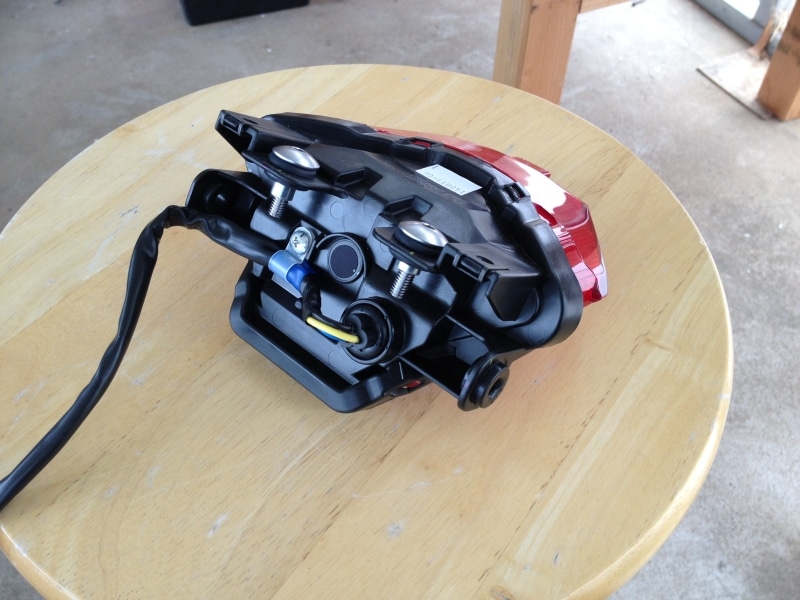
Yamaha R3 tail light taillight
Please let me know if I missed something or if you have any questions, I answer emails pretty fast!


6 Comments to “ How to remove the tail and taillight of the Yamaha R3”
You must be logged in to post a comment.
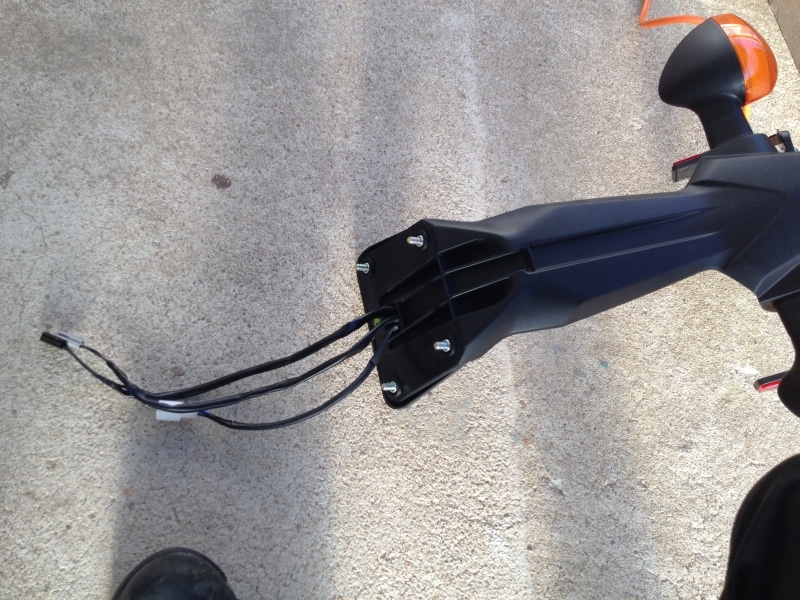
What does the back side of the tail light look like? From the lens it resembles an FZ-07 but was wondering if it is a direct replacement. Any pictures would be great! thanks in advance.
I added another picture of the back of the tail light.
The tail light is the same as the FZ-07. Confirmed it because my friend already installed an integrated tail light on his.
Can i straight remove the tail light without removing the tail fairing?
I’m not sure I understand your questions 100%, but I believe if you just try to unbolt the taillight first, you will have trouble removing it because of other panels in the way.
This was a great help installing my fender eliminator. The european R3 models obviously have different turn signal connectors, but cabeling color is the same. Thanks Jesse for the howto!