What are the best rearsets for the Yamaha R3?
This article will review a few different rearset and rearset riser options and how they address the riding position, ergonomics, and ground clearance on the Yamaha R3.
There are finally a few options for rearsets available for the Yamaha R3. Sato Racing was the first to hit market, and offers two different sets, the Standard set, and the ‘Race Concept’ set. Woodcraft, Attack Performance (which aren’t online yet but I saw the prototype in person), and Tyga all followed shortly after. And there are several different options available from Chinese suppliers on eBay. There are also a few different options for rearset riser and relocation brackets available now. We have our own set that we developed, Yoshimura has released a set, and Driven Racing has also released a set.


So with all of these options available to handle your rearsets, what is the best option???
I’m not going to go into too much detail on each set and how they function. They all do basically the same thing. They move the foot pegs higher up and farther back and have various adjustments to provide a more aggressive riding experience, improve ground clearance, increase crash durability, reduce weight, and look cool. And they all do each of these things a little more or a little less than each of their competitors.
Budget
The first thing to consider is going to be your budget, because the rearset options vary greatly in price. If your budget is limited to under $150, you will be looking at using the OEM rearsets with a riser/relocation kit, or purchase a set of rearsets from a Chinese manufacturer on eBay. Unfortunately, rearset kits have a lot of precision machined parts, and so high quality, American, Japanese, or European made rearset kits run in the $350-$520 range, compared to less than $200 for Chinese versions. For that money however, you get higher quality precision manufacturing with better fit and finish, higher quality materials and workmanship, warranty service, and availability of replacement parts. But, as you’re about to see, it doesn’t really matter if you can get cheaper rearsets from China, because none of the ones I looked at offer anywhere near the proper riding position for racing the R3. A friend of mine even tried installing two different Chinese sets only to find that neither one provided ample ground clearance and he was dangerously dragging his pegs (ya, his pegs, not his feet) during races. He eventually purchased a set of my rearset risers to use with his Chinese rearsets…total cost, probably as much or more than if he had purchased some quality rearsets in the first place, and he would have spares available. But moving on…
The second thing to consider to narrow down your choices, is what will you be using your R3 for? Are you a street rider going for occasional canyon carving sessions? Do you attend track days once in a while? Or are you building the R3 to race?
Riding Position and Ground Clearance
If you will be using your R3 for aggressive canyon riding, track days, or racing, altering the riding position and increasing ground clearance are the two primary reasons to install aftermarket rearsets or OEM rearset relocation brackets. The OEM foot peg position is very low to the ground and almost directly under the rider, forcing you to sit upright when riding the R3. This just won’t do. It also causes you to run into major ground clearance issues when you get the R3 on the race track and increase corner speed and lean angle. To ride the bike fast, with proper body position, it is necessary to move the rearsets back. You need to be able to lean your body over the bike more to lower your center of gravity and support your weight with your legs instead of your spine and arms when leaning into corners or accelerating out of corners. And it is even more important to raise them up higher, so you don’t drag your feet, or even the foot pegs on the ground when cornering. However, there is a balance between your seat height, and your rearset height. The stock seat is also very low, so if you raise the rearsets too high with the stock seat, you will find yourself in a cramped, uncomfortable riding position.
When I sat on my R3 for the first time back in April 2015, the first two things that stood out to me were the extremely low seat height and foot peg position. Since I was building this bike for racing only, I considered both of these things together when planning my first set of prototype rearset risers. People have been racing the R25 in Asia for a few years and all of those race bikes have bodywork with taller race seats, so I worked with Hotbodies to design a taller superbike seat for racing the R3, and I kept this taller seat height in mind while considering optimal rearset position. My first rearset riser prototypes offered me a very large range of positions to test.

I rode a couple track days with the stock seat, testing the foot peg position and ground clearance. My conclusion was that the optimal position for the average person (I’m 5’9″ 160 lbs, pretty average for racers) to be comfortable and have enough ground clearance, was about 65mm (2.56″) back and 60mm (2.36″) up from the stock position. With the low stock seat, it was a fine line between having enough ground clearance and not feeling too cramped. This is a pretty drastic change compared to rearsets for most supersport bikes. When Sato Racing released their standard rearsets for the Yamaha R3, the adjustment range was 47.5mm – 60mm (1.87″ – 2.36″) back and 37.5mm – 62.5mm (1.48″ – 2.46″) up. The adjustment range they came up with was very similar to what I came up with (Japanese racers are a little shorter, this probably explains the lower set back number), so it seemed like they had actually ridden the bike, and tested their rearsets, since they’ve been racing the R25 for a few years in Japan. That was good. I was testing with stock suspension and ride height, so if the bike was raised up a little, you could get away with slightly less rise. Sato also offered a ‘Race Concept’ set of rearsets, which provided a larger setback and rise of 50mm – 70mm (1.97″ – 2.76″) back and 60mm – 85mm (2.36″ – 3.35″) up. This set was likely designed with the taller race seat in mind that was being used by the R25 race teams.
In the late summer of 2015, Hotbodies finished the race seat for me to test and I honestly can’t say enough good things about it. The new, taller riding position on the race seat, combined with lower clipons and my rearset risers really transformed the feel of the little R3 to a full blown race machine. Gone were the days of the scooter feeling low seat and pegs and cramped riding position reminiscent of the Ninja 250s and the stock R3. Setup with the new seat and hardware, the bike is a dream to ride. The Hotbodies race seat with a seat foam pad puts the rider a good 1-2″ higher than with the stock seat, depending on how much you sink into the stock seat, and which seat pad you use. This means that you can raise the rearsets a good 1-2″ more with the race seat. Since the ground clearance issue was already solved, I decided to go up just another inch with the rearsets for the taller seat and allow the rider a little more room. This made for an amazingly comfortable riding position with plenty of ground clearance to make whatever suspension or tire adjustments were needed. The rearset position I settled on for use with the taller seat was 80mm (3.15″) back and 85mm (3.35″) up, pretty similar again to Sato’s ‘Race Concept’ set (and again, not set back quite as far, probably for shorter riders). I have to admit, I was impressed with Sato Racing for their work on the rearsets, even though they are the most expensive sets available for the R3. I’ve always used Vortex rearsets on my previous race bikes, but after I crashed in October and broke my OEM rearsets, I installed a set of the Sato ‘Race Concept’ rearsets and couldn’t be happier. They fit the bike so well with the new Hotbodies race seat. Everyone who has sat on my bike has marveled at the ergonomics. It barely resembles the stock R3.
Here’s the stock riding position:

Here’s the new riding position with the Woodcraft Universal 1.5″ rise clipons, Sato Racing ‘Race Concept’ rearsets, and Hotbodies bodywork with race seat (I guess it’s time to clean my leathers lol):

Woodcraft finally released their much anticipated rearsets for the R3 in the summer as well. Their adjustment range was a mere 19.1mm – 38.1mm (.75″ – 1.5″) back and 25.4mm – 50.8mm (1.0″ – 2.0″) up. These much smaller numbers are more usual of other bikes. Unfortunately, it doesn’t seem like they actually rode the R3 to see what it needed for racing, but just went with their standard design. A little disappointing from a company whose products I really like and who generally nails it for performance race parts. The lower rise available on the Woodcraft rearsets would require the ride height to be raised drastically to provide enough ground clearance, but could probably be made to work, barely. Just be sure to buy extra toe sliders.
Shortly thereafter, Attack Performance released a set, and Tyga released a set. The Attack set is a bit of a disappointment and doesn’t change the foot peg position hardly at all from stock. The Tyga set is not adjustable, and their small change from stock of 25mm up and 35mm back again, doesn’t provide enough ground clearance for racing, but is a decent change for a street bike and they are reasonably priced. Too bad they are only available in silver.
Yoshimura and Driven both released rearset riser kits for the OEM rearsets. However it’s clear that these are aimed more at street riders, and again, their small change from stock position would never cut it on the race track, and isn’t much of a change to justify the high price tag. Their products are priced substantially higher than my 2nd Generation Rearset Riser Kit and don’t offer as good of a riding position, so hopefully any of you looking for a simple upgrade to your street bike will support all of the time I put in developing these parts and purchase my riser kit instead of theirs. 
I’ve been waiting anxiously for Vortex to release some rearsets, but nothing yet. I’ve let them know that they need to get with the program and offer a major change from stock for race bikes. We’ll see what they come up with.
So which set is the best??
So for now, it appears our options are a bit limited if you are building a Yamaha R3 race bike. The only 2 sets I can honestly recommend are the Sato Racing Standard rearsets if you are using the stock seat, or the Sato Racing ‘Race Concept’ set (which is what I’m using) if you are using the taller Hotbodies race seat. For a less expensive option to get started, my 2nd Generation Rearset Riser Kit offers nearly identical riding position options as both sets (the lower 2 positions match the Standard set from Sato Racing and the upper 2 positions match the ‘Race Concept’ set). So I highly recommend purchasing a riser kit to get going and test everything out. If you don’t crash on it, you can easily resell the kit to a street rider once you confirm the riding position you like and buy a complete Sato Racing set. I know one fast racer using the Woodcraft set with the stock seat without ground clearance issues yet, so I know that it’s possible. But with the small price difference between the Woodcraft set and the Sato Racing sets, I just think it’s smarter to go with the Sato sets.
If your bike is for street riding and canyon carving, you have a lot more options available, since it is unlikely that you will run out of ground clearance. If you hate the stock riding position and want to make the bike feel like a supersport, then you should make a large change and go with my YamahaR3Racing.com risers or the Woodcraft or Sato Racing standard rearsets. If you are just looking for a better looking or lighter weight set of rearsets and don’t care much about the riding position or getting replacement parts, then go with the Woodcraft, Tyga, or whatever Chinese set you like the look of.
Here’s a photo of the stock bike and a list of the adjustment ranges compared to stock as well as a side shot of the rearsets for all of the different options I’ve looked at. I’ve marked the peg position, or position range, with a yellow area, and added the red lines to help reference where the new foot peg position is compared to the stock position. This makes it a little easier to see how big of a change my risers and the Sato Racing sets offer compared to the stock position.
Stock Yamaha R3 Rearset Position

YamahaR3Racing.com Rearset Riser Kit
50mm – 80mm Back
(1.97″ – 3.15″ Back)
60mm – 85mm Up
(2.36″ – 3.35″ Up)

Driven Rearset Relocation Brackets
15mm – 30mm Back (estimated)
(.59″ – 1.18″ Back)
18mm – 25mm Up (estimated)
(.71″ – .98″ Up)

Yoshimura Rearset Riser Brackets
45mm Back
(1.77″ Back)
30mm – 45mm Up
(1.18″ – 1.77″ Up)

Sato Racing Standard Rearsets
47.5mm – 60mm Back
(1.87″ – 2.36″ Back)
37.5mm – 62.5mm Up
(1.48″ – 2.46″ Up)

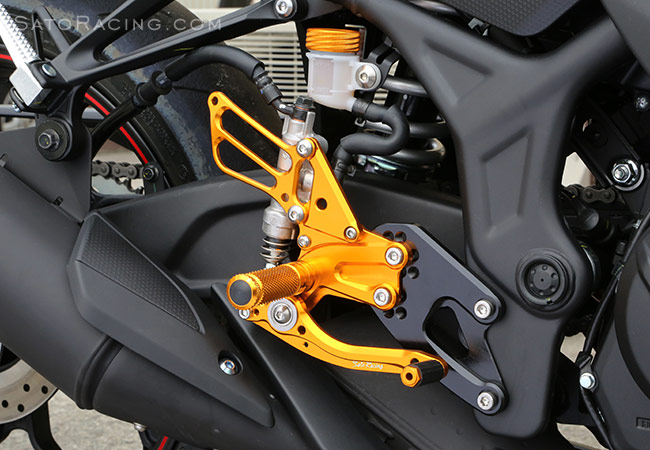
Sato Racing ‘Race Concept’ Rearsets
50mm – 70mm Back
(1.97″ – 2.76″ Back)
60mm – 85mm Up
(2.36″ – 3.35″ Up)

Tyga Rearsets
35mm Back
(1.38″ Back)
25mm Up
(.98″ Up)

Woodcraft Rearsets
19.1mm – 38.1mm Back
(.75″ – 1.5″ Back)
25.4mm – 50.8mm Up
(1.0″ – 2.0″ Up)

various Chinese rearsets from eBay (Arashi, Area 22, Mad Moto, etc.)
0mm – 30mm Back
(0″ – 1.18″ Back)
-10mm – 25mm Up
(-.39″ – .98″ Up)


7 Comments to “ What are the best rearsets for the Yamaha R3?”
You must be logged in to post a comment.
Awesome post! Just ran out of clearance while cornering with my stock R3. Will need to make adjustments as you listed above. Thank you for sharing. Wish I knew about this before I purchased my R3. But then again, I never thought I would be taking it to the track and riding this hard. Next up will be suspension changes, a tire swap, and maybe some grips for the sides of the tank.
Awesome article, thanks! What is your take on the Gilles R3 rearsets? Are they track worthy?
I haven’t done any testing with the Gilles yet, they weren’t available when I was doing my rearset testing.
Great article ! Very useful, thanks !
Where can I find a taller race seat like the one you have?
I am using this one:
https://www.norton-motorsports.com/product/hotbodies-tank-coversbk-race-seat-yamaha-r3-2015/
But this one is about the same height and compatible with street bikes:
https://www.norton-motorsports.com/product/nortonfab-motorsports-r3-supersport-seat-yamaha-r3/
Have you had a chance to try the vortex rearsets now? How do they compare to Sato ‘Race Concept’ or your relocation bracket?
The Vortex are way too low for race use. We don’t recommend them for racing, only for street use or casual track days.